Home of Science

Physics Calculations

Month: July 2023 Page 15 of 17

Resistance Thermometer

What is Resistance Thermometer?

A Resistance Thermometer, often referred to as a Resistance Temperature Detector (RTD), is a type of temperature sensor that operates based on the principle of the electrical resistance of a metal changing with temperature. The most common metal used for RTDs is platinum, due to its stability and predictable temperature-resistance relationship.

Resistance Thermometer: An Overview

Before we delve deeper into the details, let us get a fundamental understanding of what a resistance thermometer is. A resistance thermometer, also known as a resistance temperature detector (RTD), is a temperature sensor that measures the change in electrical resistance of a metal wire or element with variations in temperature. This change in resistance is then correlated to the temperature of the medium being monitored.

How Do Resistance Thermometers Work?

A resistance thermometer operates based on the principle that the electrical resistance of a conductor changes linearly with temperature. Typically, platinum is used as the sensing element due to its stable and repeatable characteristics. The platinum element’s resistance increases as the temperature rises and decreases as the temperature falls.

Here is how an RTD works:

  1. Resistance Variation: The electrical resistance of the metal (usually platinum) increases linearly with temperature. This relationship is well-defined and reproducible.
  2. Measurement Circuit: The RTD is incorporated into an electrical circuit, forming one or more resistive elements. As the temperature changes, the resistance of the RTD changes accordingly.
  3. Resistance Measurement: By measuring the electrical resistance of the RTD, one can determine the temperature. This is often done using a Wheatstone bridge circuit or other measurement techniques.

RTDs are known for their high accuracy and stability over a wide temperature range. They find applications in various industries, including industrial automation, HVAC systems, and scientific research, where precise and reliable temperature measurements are essential.

The Platinum Resistance Thermometer: A Closer Look

Platinum resistance thermometers, also known as platinum RTDs, are the most widely used type of resistance thermometers. The platinum element in these sensors is wound into a coil or deposited on a ceramic substrate. This design ensures better sensitivity and accuracy for temperature measurement.

Understanding Temperature Calibration and Accuracy

Calibration is a critical aspect of resistance thermometers to ensure accuracy in temperature readings. Manufacturers subject the sensors to precise calibration processes using well-controlled baths or comparison with known temperature standards. The accuracy of resistance thermometers is typically expressed in terms of class, with Class A offering higher precision than Class B.

Applications of Resistance Thermometers

Resistance thermometers find applications in various industries where precise temperature measurements are essential for process control and safety. Let’s explore some of the key industries that rely on resistance thermometers:

1. HVAC Systems

In heating, ventilation, and air conditioning (HVAC) systems, resistance thermometers are used to monitor air temperatures and regulate heating and cooling systems for optimum comfort and energy efficiency.

2. Industrial Process Control

Resistance thermometers are widely used in industrial processes to monitor and control temperatures during manufacturing processes, ensuring product quality and consistency.

3. Automotive Industry

In the automotive industry, resistance thermometers play a crucial role in engine temperature monitoring, helping to prevent overheating and optimize fuel efficiency.

4. Food and Beverage

The food and beverage industry relies on resistance thermometers for temperature monitoring during food processing and storage to maintain food safety standards.

5. Pharmaceuticals

Pharmaceutical manufacturing processes require precise temperature control, and resistance thermometers are employed to maintain the integrity of sensitive medications and vaccines.

6. Aerospace and Aviation

In the aerospace sector, resistance thermometers are used to monitor temperature variations in critical components, ensuring safe and efficient flight operations.

FAQs About Resistance Thermometers

Q: How accurate are resistance thermometers?

A: Resistance thermometers offer high accuracy, with Class A platinum RTDs providing precision up to ±0.1°C, while Class B RTDs offer accuracy up to ±0.5°C.

Q: Are resistance thermometers suitable for extreme temperature conditions?

A: Yes, resistance thermometers are well-suited for extreme temperature conditions, as platinum RTDs can measure temperatures from -200°C to over 1000°C.

Q: Can I use resistance thermometers for liquid temperature measurements?

A: Absolutely! Resistance thermometers are commonly used for liquid temperature measurements, making them ideal for applications in laboratories, chemical industries, and more.

Q: How do I calibrate a resistance thermometer?

A: Calibration of resistance thermometers can be done using well-controlled baths or by comparing them with known temperature standards, ensuring accurate readings.

Q: What are the advantages of using platinum resistance thermometers?

A: Platinum resistance thermometers offer excellent accuracy, long-term stability, and repeatable performance, making them the preferred choice in many critical temperature sensing applications.

Q: Can resistance thermometers be used for wireless temperature monitoring?

A: Yes, with advancements in technology, wireless resistance thermometers are available, allowing for remote temperature monitoring in challenging environments.

Conclusion

Resistance thermometers are indispensable tools in the realm of temperature sensing and control. Their accuracy, reliability, and versatility have made them essential in various industries, from manufacturing to healthcare and beyond.

Understanding the principles and applications of resistance thermometers empowers engineers, technicians, and researchers to make informed decisions and ensure the efficient functioning of processes and systems.

You may also like to read:

Gas Thermometer

Gas Thermometer

What is a Gas Thermometer?

A gas thermometer is a temperature measurement device that uses the change in pressure or volume of a gas to indicate temperature.

Gas Thermometer
Details

Parts of Gas Thermometer

A gas thermometer typically consists of a bulb filled with a gas (working substance), a capillary tube, and a pressure or volume measuring device.

Gas Thermometer: An Overview

Gas thermometers, also known as gas-filled thermometers or gas-actuated thermometers, are devices used to measure temperature by utilizing the thermal expansion of gases. These thermometers function based on the ideal gas law, which states that at constant pressure, the volume of a gas is directly proportional to its absolute temperature.

How Do Gas Thermometers Work?

A gas thermometer operates based on the principle that the pressure or volume of a gas changes with temperature. When the temperature changes, the gas inside the bulb expands or contracts, causing a corresponding change in pressure or volume. This change is measured using a pressure gauge or by observing the movement of a piston or liquid in a calibrated tube, providing an indication of the temperature.

Gas thermometers consist of a bulb filled with a gas (commonly nitrogen, hydrogen, or helium), connected to a capillary tube and a pressure measuring device, such as a Bourdon tube or a diaphragm. When the temperature changes, the gas inside the bulb expands or contracts, causing the pressure in the capillary tube to change accordingly. This pressure change is then measured and correlated to the temperature reading.

Gas Thermometer at Absolute Zero

Calibrating a gas thermometer at absolute zero (0 Kelvin or -273.15 degrees Celsius) is impractical because reaching absolute zero is theoretically impossible. As temperature approaches absolute zero, gases condense into liquids and eventually solidify, making it challenging to maintain a gas state for calibration. Additionally, accurately measuring temperatures near absolute zero poses technical difficulties, making it more practical to calibrate gas thermometers at higher, more accessible temperatures.

What is Constant Volume Gas Thermometer

A constant volume gas thermometer, also known as a constant volume gas thermometer, maintains a fixed volume of gas throughout the temperature measurement process. It measures temperature based on the change in pressure of the gas when subjected to temperature variations, following principles outlined in Charles’s Law. The pressure is directly proportional to the temperature when the volume is held constant. This type of thermometer is used in scientific applications where precise temperature measurements are required.

The Ideal Gas Law in Gas Thermometry

In gas thermometry, the ideal gas law, represented as PV = nRT, plays a fundamental role. Here, P represents the pressure, V is the volume of the gas, n is the amount of gas (in moles), R is the ideal gas constant, and T stands for the absolute temperature. By keeping the pressure constant, we can measure the volume and temperature changes to determine the temperature accurately.

Applications of Gas Thermometers

Gas thermometers find applications in various industries due to their accuracy and reliability. Some common uses include:

  1. Laboratories and Research Facilities: We use gas thermometers extensively in scientific research, where precise temperature measurements are essential for conducting experiments and calibrating other instruments.
  2. Meteorology: Weather stations often employ gas thermometers to measure atmospheric temperature, which aids in weather forecasting and climate studies.
  3. Industrial Processes: In manufacturing, gas thermometers play a crucial role in controlling temperature during different processes, ensuring product quality and safety.
  4. Thermodynamic Studies: Gas thermometers are valuable tools for studying the behavior of gases under different temperature conditions, providing crucial data for thermodynamic research.
  5. Astronomy: Astronomers use gas thermometers to measure the temperatures of celestial objects, gaining insights into their composition and physical properties.
  6. Medical Applications: We also use gas thermometers in medical settings to measure body temperature accurately, crucial for diagnosing and monitoring patients.

Advantages of Gas Thermometers

Gas thermometers offer several advantages, making them indispensable in temperature measurement:

  • High Accuracy: Gas thermometers provide precise and reliable temperature readings, making them suitable for critical applications.
  • Wide Temperature Range: These thermometers can measure a broad range of temperatures, from extremely low to very high, making them versatile in various settings.
  • Non-Contact Measurement: In some cases, gas thermometers enable non-contact temperature measurement, reducing the risk of contamination or damage to sensitive samples.
  • Stability and Longevity: Gas thermometers are known for their stability and long operational life, making them cost-effective over time.

Challenges and Limitations

While gas thermometers are highly accurate, they also have some limitations:

  • Slow Response Time: Gas thermometers might have a slower response time compared to electronic thermometers, which is a crucial consideration for some applications.
  • Fragility: The delicate components of gas thermometers can be susceptible to damage if mishandled or exposed to harsh environments.
  • Environmental Influence: External factors like pressure and humidity can influence gas thermometers, potentially affecting their accuracy.
  • Calibration Requirements: Regular calibration is necessary to maintain the accuracy of gas thermometers, which can be a time-consuming process.

FAQs

How often should I calibrate my gas thermometer?

It is recommended to calibrate your gas thermometer annually or as specified by the manufacturer. Frequent calibration ensures accurate temperature measurements and consistent performance.

Can gas thermometers measure extremely high temperatures?

Yes, gas thermometers can measure very high temperatures, depending on the gas used. Some specialized gas thermometers can handle temperatures well beyond 1000 degrees Celsius.

Are gas thermometers suitable for industrial applications?

Absolutely! We use gas thermometers in industrial settings due to their accuracy and reliability, making them ideal for controlling temperature during manufacturing processes.

Do gas thermometers require regular maintenance?

Like any precision instrument, gas thermometers require periodic maintenance and calibration to ensure accurate readings. Routine maintenance can prolong their operational life and performance.

How do gas thermometers compare to electronic thermometers?

Gas thermometers offer high accuracy but might have slower response times compared to electronic thermometers. Electronic thermometers are generally more suitable for rapid temperature changes.

Can gas thermometers be used in hazardous environments?

Yes, gas thermometers can be designed to meet safety standards and used in hazardous environments. However, we must take proper precautions to ensure the safety of the personnel and the equipment.

Conclusion

Gas thermometers are indispensable tools in accurately measuring temperature in gaseous environments. By leveraging the principles of the ideal gas law, these thermometers provide high accuracy and wide temperature range measurements, making them invaluable in various industries and scientific research.

Understanding their applications, advantages, and limitations will help professionals make informed decisions when choosing temperature measurement devices.

You may also like to read:

Boyle’s Law

Boyle’s Law

What is Boyle’s Law?

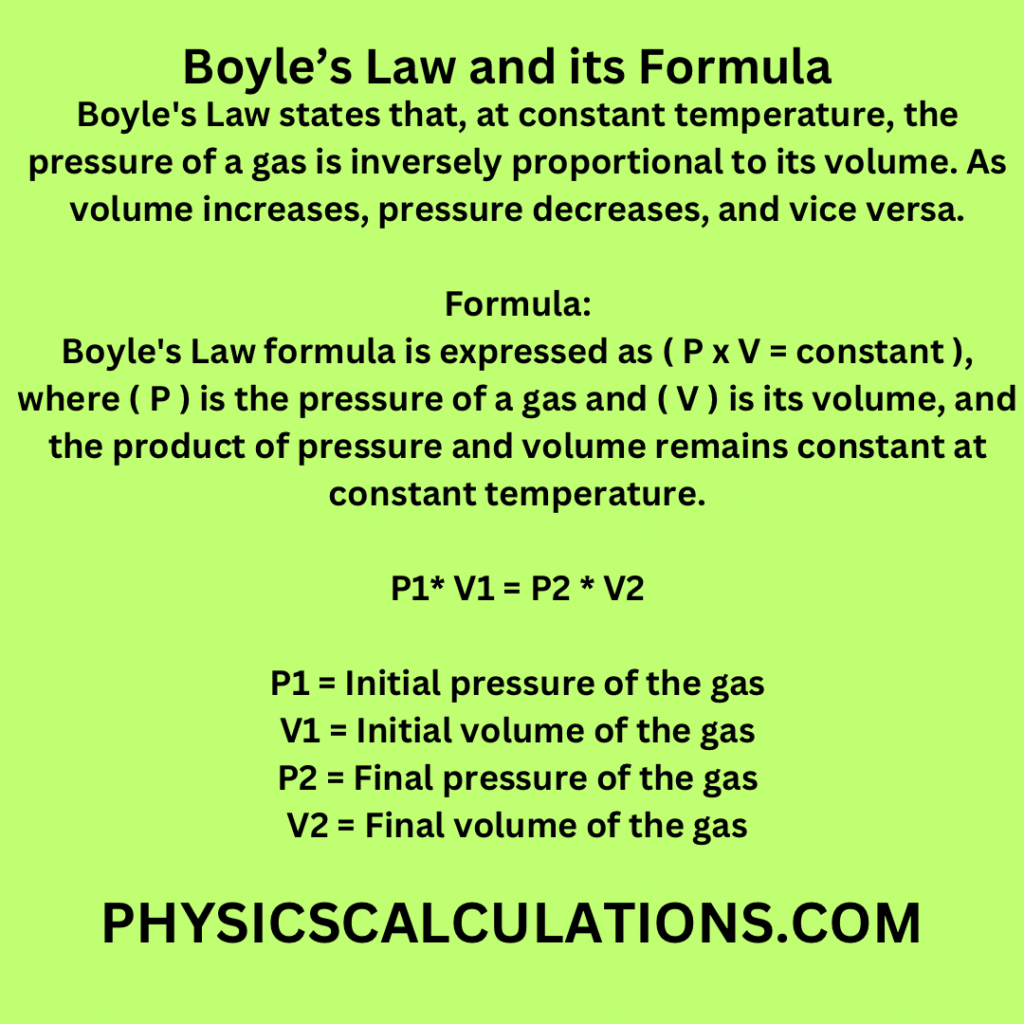
Boyle’s Law states that, at constant temperature, the pressure of a gas is inversely proportional to its volume. As volume increases, pressure decreases, and vice versa.

Boyle’s Law formula is expressed as ( P x V = constant ), where ( P ) is the pressure of a gas and ( V ) is its volume, and the product of pressure and volume remains constant at constant temperature.

Boyle’s Law: Explanation

The Boyle’s Law is a fundamental gas law that states the inverse relationship between the pressure and volume of a given amount of gas, provided the temperature remains constant. In simple terms, as the pressure exerted on a gas increases, its volume decreases, and vice versa.

Now, let us talk about Boyle’s Law in a way that’s easy to understand. Imagine you have a balloon, and you are going to find out what happens when you squish it or let it expand.

Boyle’s Law:
Boyle’s Law is like a magical rule for balloons. It helps us understand what happens when we change the pressure and size of a balloon, but we keep the temperature the same. So, if you squeeze a balloon, what happens to its pressure and size?

Balloon Experiment:
Picture a balloon at room temperature, not too hot or cold. Now, if you gently squeeze the balloon, you’ll notice it gets smaller. Boyle’s Law helps us understand this! It says that when you change the pressure on a balloon, the size of the balloon changes too.

Simple Idea:
Think of the gas inside the balloon as a bunch of tiny, bouncy balls. When you squeeze the balloon, you’re pushing those balls closer together. When they’re closer, the balloon gets smaller. So, Boyle’s Law is like saying, “When you squish a balloon, its size goes down.”

Formula (Kind of):
Now, if we want to sound a bit like scientists, Boyle’s Law can be written as ( P x V = constant), where (P) is pressure, (V) is volume, and their product stays the same when you squish or expand the balloon.

In simpler terms, Boyle’s Law helps us figure out what happens to a balloon when we change how much we squeeze it or let it expand while keeping the temperature the same. It’s like learning about the magic of balloons and how they react to pressure changes!

The History of Boyle’s Law

Boyle’s Law has a rich historical background that dates back to the 17th century. Let’s take a brief journey through its origin and development.

The Discoverer: Robert Boyle

Robert Boyle, an Irish natural philosopher, chemist, and physicist, is credited with the discovery of Boyle’s Law. In 1662, he published “The Sceptical Chymist,” a groundbreaking work that laid the foundation for modern chemistry and introduced the world to Boyle’s Law.

Predecessors of Boyle’s Law

Before Boyle’s groundbreaking work, several scientists and philosophers contributed to the understanding of gas behavior. Among them were Evangelista Torricelli, Galileo Galilei, and Edme Mariotte, whose collective insights paved the way for Boyle’s Law.

Experimental Evidence

Boyle conducted a series of meticulous experiments using a J-shaped glass tube filled with mercury, now known as the “Boyle’s Tube.” By varying the pressure and measuring the corresponding volume changes, he established the empirical evidence supporting his law.

The Mathematical Expression of Boyle’s Law

Mathematically, Boyle’s Law equation can be expressed as follows:

P1* V1 = P2 * V2

Where:

  • P1 = Initial pressure of the gas
  • V1 = Initial volume of the gas
  • P2 = Final pressure of the gas
  • V2 = Final volume of the gas

Real-Life Applications of Boyle’s Law

Boyle’s Law finds applications in numerous fields, significantly impacting our daily lives. Let’s explore some of the most notable applications:

1. Scuba Diving

The principles of Boyle’s Law plays a key role in scuba diving. As divers descend into deeper waters, the pressure increases, causing the volume of the air in their scuba tanks to decrease. Understanding this relationship is essential for safe and successful dives.

2. Medical Ventilators

Medical ventilators, used to assist patients with breathing difficulties, rely on Boyle’s Law to regulate air pressure and volume during the breathing cycle.

3. Aerosol Cans

Aerosol cans, such as spray paints and deodorants, utilize Boyle’s Law to dispense their contents. When the valve is opened, the pressure inside the can decreases, allowing the contents to be released.

4. Weather Balloons

Boyle’s Law plays a crucial role in weather balloons, which change volume as they ascend or descend through the atmosphere due to varying air pressure.

5. Lung Function Testing

Pulmonary function tests in medicine employ Boyle’s Law principles to assess lung function and diagnose respiratory conditions.

FAQs (Frequently Asked Questions)

  1. What is Boyle’s Law?
    Boyle’s Law states the inverse relationship between pressure and volume in a gas when the temperature remains constant.
  2. Who discovered Boyle’s Law?
    The law was discovered by Robert Boyle, an Irish natural philosopher, chemist, and physicist, in the 17th century.
  3. What is the mathematical expression of Boyle’s Law?
    The mathematical expression of Boyle’s Law is given by the equation: P1 * V1 = P2 * V2.
  4. How is Boyle’s Law applied in scuba diving?
    In scuba diving, as divers descend into deeper waters, the pressure increases, causing the volume of the air in their scuba tanks to decrease, following Boyle’s Law.
  5. What are some real-life applications of Boyle’s Law?
    Boyle’s Law finds applications in various fields, including scuba diving, medical ventilators, aerosol cans, weather balloons, and lung function testing.
  6. How does Boyle’s Law impact weather balloons?
    Weather balloons change volume as they ascend or descend through the atmosphere due to varying air pressure, in accordance with Boyle’s Law.

Conclusion

Boyle’s Law is a fundamental concept in physics, providing invaluable insights into the relationship between pressure and volume in gases. Its real-life applications span various industries, impacting our lives in more ways than we might realize. Understanding this law helps us harness its principles for innovation, safety, and technological advancements.

So, the next time you use an aerosol can, go scuba diving, or undergo a lung function test, remember that Boyle’s Law is at work, shaping the world around us.

You may also like to read:

Charle’s Law

Charle’s Law

What is Charle’s Law?

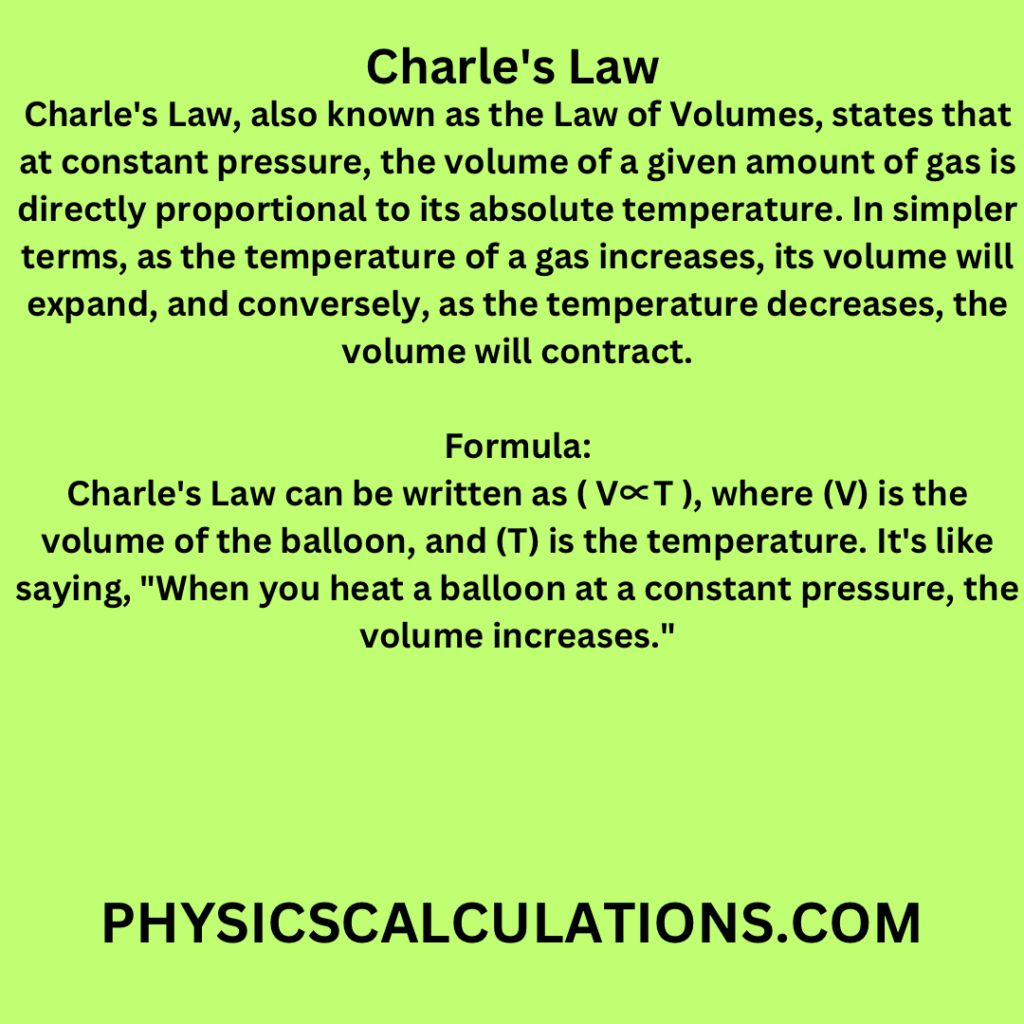
Charle’s Law, also known as the Law of Volumes, states that at constant pressure, the volume of a given amount of gas is directly proportional to its absolute temperature. In simpler terms, as the temperature of a gas increases, its volume will expand, and conversely, as the temperature decreases, the volume will contract.

Charle's Law

Explanation: Charle’s Law

Imagine you have a balloon, and you are going to see how it behaves when you change the temperature. That is where Charle’s Law comes in!

Charle’s Law:
Charle’s Law is like a special rule for balloons, telling us how they react when things get hot or cold. It says that if you keep the pressure the same (meaning the balloon isn’t squished or pulled), and then you heat it up, the balloon gets bigger.

Balloon Experiment:
Picture this: You have a balloon at room temperature, and it’s a certain size. Now, if you take that balloon and heat it up (maybe with a hairdryer), you will see it gets bigger. Charle’s Law helps us understand that when you heat a balloon at a constant pressure, the size of the balloon increases.

Simple Idea:
Think of your balloon as a bit like a superhero. When it gets warmer, it wants to stretch and grow a bit. The gas particles inside the balloon start moving faster and need more space, so the balloon expands.

Formula (Kind of):
If we want to sound a bit like scientists, Charle’s Law can be written as ( VT ), where (V) is the volume of the balloon, and (T) is the temperature. It’s like saying, “When you heat a balloon at a constant pressure, the volume increases.”

In simpler terms, Charle’s Law helps us predict what happens to a balloon when we warm it up while keeping the pressure the same. It’s like understanding how our balloon friend reacts to changes in temperature.

The History of Charle’s Law

The law is named after Jacques Alexandre César Charles, a French physicist and inventor who first formulated this gas law in the late 18th century. Charles, along with Joseph Louis Gay-Lussac, played a crucial role in the development of modern gas laws. His pioneering work laid the foundation for understanding the behaviour of gases under varying conditions.

Charle’s Law Formula

Mathematically, Charle’s Law can be represented by the equation:

V1 / T1 = V2 / T2

Where:

  • V1 and V2 are the initial and final volumes of the gas, respectively.
  • T1 and T2 are the initial and final absolute temperatures of the gas, measured in Kelvin.

The Importance of Absolute Temperature (Kelvin)

Before we proceed further, it is vital to grasp the concept of absolute temperature, which is measured in Kelvin (K). Unlike Celsius or Fahrenheit scales, the Kelvin scale starts from absolute zero, where all molecular motion ceases. It is crucial to use Kelvin in gas law calculations to avoid negative values and ensure accurate results.

Understanding the Behavior of Gases

To comprehend Charle’s Law better, let’s explore how gases behave under different temperature conditions:

  1. Gas Expansion with Heat

When you heat a gas, the energy is transferred to its molecules, causing them to move with higher kinetic energy. As a result, the gas molecules collide more frequently with the container walls, exerting greater pressure and causing the volume to increase.

  1. Gas Contraction with Cooling

On the contrary, when you cool a gas, its molecules lose kinetic energy, reducing the frequency of collisions with the container walls. This leads to a decrease in pressure and, consequently, a contraction in volume.

The Charle’s Law Apparatus

To conduct experiments and validate Charle’s Law, scientists and researchers use a Charle’s Law apparatus. This apparatus typically consists of a graduated cylinder with a movable piston and a temperature sensor. By manipulating the temperature and measuring volume changes, they can observe the direct relationship between volume and temperature.

Real-World Applications of Charle’s Law

Charle’s Law has significant applications in various industries and everyday scenarios. Let’s explore some practical implementations:

1. Hot Air Balloons: Taking Flight with Physics

Hot air balloons operate on the principle of Charle’s Law. When the air inside the balloon is heated, it becomes less dense than the surrounding air, causing it to rise. As the balloon ascends, the temperature drops, and the gas cools, leading to a decrease in volume. To maintain altitude, the pilot can control the burners to maintain a steady temperature and volume.

2. Scuba Diving: Breathable Depths

Scuba divers depend on Charle’s Law to breathe underwater comfortably. As they descend into deeper waters, the pressure increases, causing the volume of the compressed air in their tanks to decrease. Regulators adjust the airflow to match the changing volume, allowing divers to breathe at any depth.

3. Aerosol Cans: Spraying Science

Aerosol cans, such as spray paints and deodorants, use Charle’s Law to release their contents. The propellant gas inside the can expands with heat, increasing pressure and forcing the product out when the nozzle is pressed.

4. Air Conditioning and Refrigeration: Cooling Effect

Air conditioning and refrigeration systems rely on Charle’s Law to cool indoor spaces and preserve perishable items. The refrigerant inside the system expands and contracts, absorbing heat from the surroundings and dissipating it outside.

FAQs

  1. What is the Difference Between Charle’s Law and Boyle’s Law?

Charle’s Law deals with the relationship between volume and temperature of a gas, while Boyle’s Law relates to the relationship between volume and pressure, with temperature held constant.

  1. Why is Kelvin Used in Gas Law Calculations?

Kelvin is used because it starts from absolute zero, ensuring non-negative values in gas law equations and providing a more accurate representation of temperature.

  1. Can Charle’s Law be Applied to All Gases Equally?

Charle’s Law is applicable to ideal gases, which perfectly follow the gas laws under all conditions. Real gases may not always follow these laws at extreme conditions.

  1. Who Discovered Charle’s Law?

Charle’s Law was formulated by Jacques Alexandre César Charles, a French physicist and inventor, in the late 18th century.

  1. Is Charle’s Law Only Applicable at Constant Pressure?

Yes, Charle’s Law is specifically applicable when the pressure of the gas remains constant.

  1. What are Some Practical Examples of Charle’s Law in Everyday Life?

Practical examples include hot air balloons, scuba diving, aerosol cans, and air conditioning systems.

Conclusion

In conclusion, Charle’s Law is a foundational concept in the study of gases and plays a vital role in numerous real-world applications.

Understanding how temperature affects gas volume has revolutionized various industries and enriched our lives in countless ways. From soaring high in hot air balloons to staying cool during scorching summers, Charle’s Law continues to shape the world around us.

So, the next time you witness a hot air balloon gently drifting in the sky or enjoy the refreshing breeze from an air conditioner, remember the profound impact of Charle’s Law, the gas law that transformed our understanding of nature’s behaviour.

You may also like to read:

Gay-Lussac’s Law

Experiment: Gay-Lussac’s Law

What is Gay-Lussac’s Law?

Gay-Lussac’s Law states that, at constant volume, the pressure of a gas is directly proportional to its absolute temperature. This relationship is expressed as ( P ∝ T ), where (P) is pressure, and (T) is temperature.

We can clearly see that Gay-Lussac’s Law describes the relationship between the pressure and temperature of a gas at constant volume. Below is a description of the experiment:

StepDescription
1Use a sealed container with a fixed volume of gas.
2Measure the initial pressure P1 of the gas.
3Change the temperature T of the gas while
keeping the volume constant.
4Measure the final pressure P2 of the gas.
5Observe the relationship between the initial and
final pressures at different temperatures.

Note:

  • Gay-Lussac’s Law states that, at constant volume, the pressure of a gas is directly proportional to its absolute temperature.
  • The equation is ( P1/T1 = P2/T2 ), where ( P1 ) and ( P2 ) are initial and final pressures, and ( T1 ) and ( T2 ) are initial and final temperatures in absolute scale (Kelvin).

Experiment: Gay-Lussac’s Law Unveiled

In this section, we will explore the groundbreaking experiment conducted by Joseph Louis Gay-Lussac, a pioneering chemist of the 19th century. His work led to the formulation of Gay-Lussac’s Law, which explains how gases behave when temperature and pressure change. Let’s dive in!

The Pioneering Chemist: Joseph Louis Gay-Lussac

Before we delve into the experiment itself, let’s take a moment to learn about the scientist behind this fundamental gas law. Joseph Louis Gay-Lussac was born in France in 1778 and made significant contributions to the field of chemistry. His work on gases and volumetric analysis laid the foundation for several key principles in modern chemistry.

Setting the Stage: Experimental Setup

In this subsection, we will explore the experimental setup that Gay-Lussac used to study the relationship between temperature and volume of gases at constant pressure. Understanding the apparatus and its intricacies will provide us with valuable insights into the experimental process.

The Experimental Procedure: Step by Step

Follow along as we detail the step-by-step procedure of Gay-Lussac’s groundbreaking experiment. From initial measurements to data collection and analysis, each step was crucial in revealing the patterns governing gas behavior.

Observations and Data Analysis

With the experiment complete, Gay-Lussac meticulously recorded his observations and data. In this section, we will examine the results of his experiment and how they formed the basis for his revolutionary gas law.

Formulation of Gay-Lussac’s Law

With data in hand, Gay-Lussac formulated his law that governs the behavior of gases. We will explore the mathematical representation of the law and understand the principles that underpin it.

The Gas Law Equation: Understanding the Variables

To grasp the essence of Gay-Lussac’s Law fully, we need to understand the significance of each variable in the gas law equation. This subsection will break down the equation, explaining the roles of temperature, pressure, and volume in determining gas behavior.

Applications in the Real World

Gay-Lussac’s Law is not just a theoretical concept; it has numerous practical applications in various fields. From industrial processes to weather phenomena, understanding gas behavior at constant pressure is essential. Let’s explore some real-world applications of this fundamental gas law.

The Combined Gas Law: Extending the Principles

Building upon Gay-Lussac’s Law, the scientific community developed the Combined Gas Law, which unites several gas laws into one comprehensive equation. We will explore this extension and its implications for understanding gas behavior.

Deviations from Ideal Behavior

While Gay-Lussac’s Law and the Combined Gas Law offer valuable insights, real gases do not always behave ideally. This section will shed light on the deviations from ideal behavior and the factors that contribute to them.

Gay-Lussac’s Law and the Kinetic Molecular Theory

To gain a deeper understanding of gas behavior, we will connect Gay-Lussac’s Law to the Kinetic Molecular Theory. This theory explains the motion of gas particles and how their interactions lead to the macroscopic behavior described by the gas laws.

Exploring Other Gas Laws

Beyond Gay-Lussac’s Law, several other gas laws play essential roles in understanding gas behavior. We will briefly introduce some of these laws and their applications.

Frequently Asked Questions (FAQs)

Q: What is Gay-Lussac’s Law?

Gay-Lussac’s Law states that the pressure of a gas is directly proportional to its absolute temperature when the volume is kept constant.

Q: What is the significance of Gay-Lussac’s Law?

Gay-Lussac’s Law provides valuable insights into the behavior of gases when exposed to changes in temperature, allowing us to predict their responses in various situations.

Q: How is Gay-Lussac’s Law applied in the real world?

This gas law finds applications in various fields, including weather forecasting, industrial processes, and gas-related engineering applications.

Q: What is the difference between ideal and real gas behavior?

Ideal gases perfectly adhere to the gas laws, while real gases deviate due to factors like intermolecular forces and molecular volume.

Q: Can Gay-Lussac’s Law be derived from the Kinetic Molecular Theory?

Yes, Gay-Lussac’s Law can be understood and derived from the principles of the Kinetic Molecular Theory, which describes gas particles’ behavior at the molecular level.

Q: Are there any other important gas laws apart from Gay-Lussac’s Law?

Yes, several other significant gas laws, like Boyle’s Law and Charles’s Law, contribute to our understanding of gas behavior.

Conclusion: Unraveling the Secrets of Gas Behavior

In conclusion, Gay-Lussac’s Law stands as a cornerstone in the study of gas behaviour. Through his meticulous experiment, Joseph Louis Gay-Lussac provided us with a deeper comprehension of the interactions between gases and temperature at constant pressure.

The law’s applications in diverse fields make it an indispensable tool for scientists and engineers alike. By connecting it to the Kinetic Molecular Theory. We can gain a more profound insight into the molecular underpinnings of gas behaviour. Additionally, as we continue to explore the world of science. Let us cherish the legacy of these groundbreaking discoveries that shape our understanding of the natural world.

You may also like to read:

What is Pressure Law?

What is Pressure Law?

Pressure Law – A Fundamental Principle

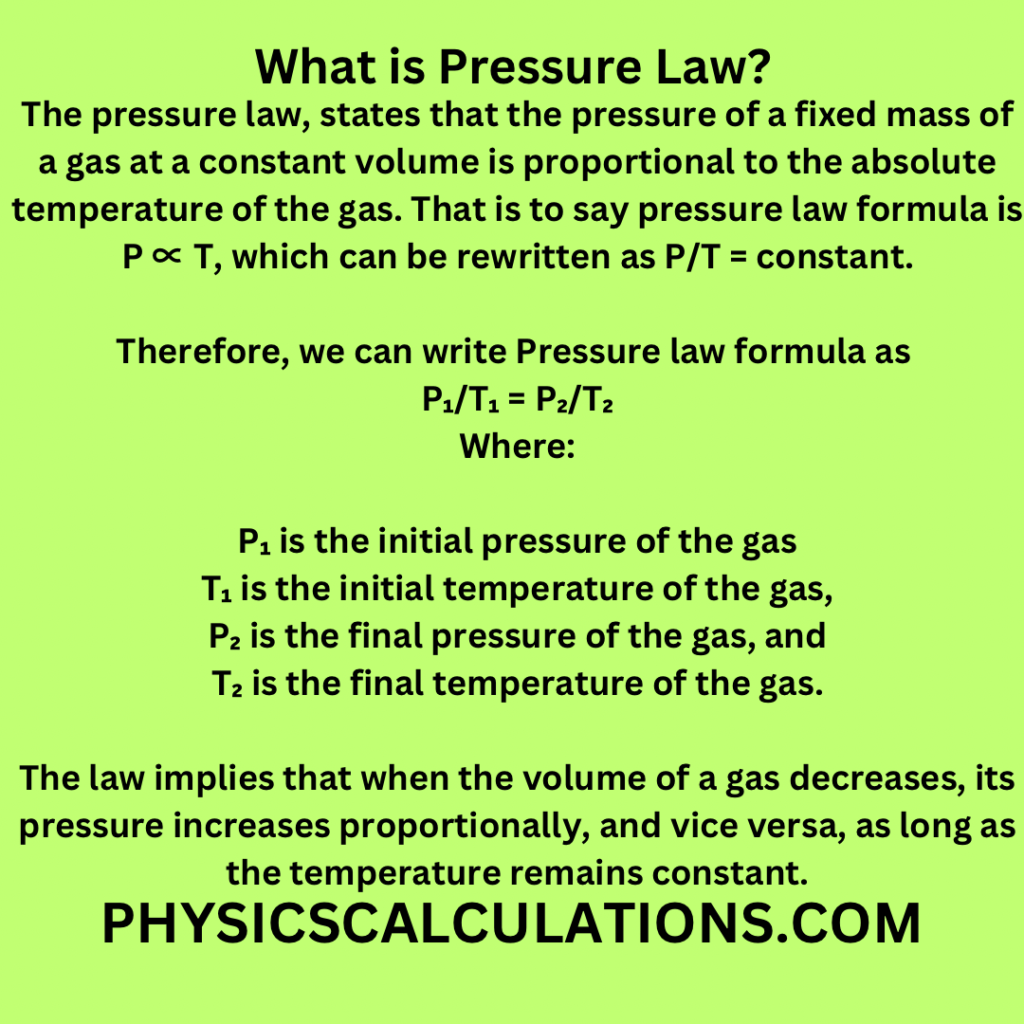
The pressure law, states that the pressure of a fixed mass of a gas at a constant volume is proportional to the absolute temperature of the gas. That is to say pressure law formula is P ∝ T, which can be rewritten as P/T = constant.

Therefore, we can write Pressure law formula as

P₁/T₁ = P₂/T₂

Where:

  • P₁ is the initial pressure of the gas,
  • T₁ is the initial temperature of the gas,
  • P₂ is the final pressure of the gas, and
  • T₂ is the final temperature of the gas.

The law implies that when the volume of a gas decreases, its pressure increases proportionally, and vice versa, as long as the temperature remains constant.

What is pressure

Explanation: Pressure Law

Imagine you have a balloon, and you are keeping the number of breaths you take the same, so the volume inside the balloon stays constant. Now, let us talk about how the pressure inside the balloon changes when things heat up.

Pressure Law:
The Pressure Law is like a secret rule that tells us how the pressure inside our balloon behaves when we heat it. It says that if we keep the volume the same, meaning the balloon doesn’t get bigger or smaller, and then we heat it up, the pressure inside the balloon goes up too.

Balloon Experiment:
Imagine you have a balloon at room temperature, and you know the pressure inside it. Now, if you heat that balloon (let us say you put it near a warm lamp), the pressure inside the balloon will increase. The Pressure Law helps us understand this relationship.

Simple Idea:
Think about a balloon that is cozy and warm. The gas particles inside it start moving faster and bumping into the balloon walls more. This makes the pressure go up. So, when you heat the balloon, the pressure inside increases because the gas particles are getting more active.

Formula:
Now, if we want to sound a bit like scientists, the Pressure Law is often written as ( P ∝ T ), where (P) is pressure, and (T) is temperature. It means “pressure is proportional to temperature.”

In simple terms, it’s like saying, “When you heat up a balloon without letting it change size, the pressure inside will go up.” So, the Pressure Law helps us predict how our balloon will react to changes in temperature while keeping its size the same.

Applications of the Pressure Law

Boyle’s law has significant applications in various fields. Let’s explore some of the key applications where this fundamental principle plays a crucial role:

1. Gas Storage in Containers

The pressure law is crucial in understanding how gases behave when stored in containers. For example, understanding the relationship between gas volume and pressure helps in designing safe and efficient storage tanks for gases used in industries and homes.

2. Scuba Diving and Underwater Exploration

Scuba divers rely on the pressure law to understand how the volume of gas in their diving tanks changes with depth. As they descend deeper into the water, the pressure increases, causing the gas volume to decrease. Proper understanding of this phenomenon is vital for safe diving practices.

3. Weather Forecasting

Meteorologists use the pressure law to understand atmospheric pressure changes. Monitoring changes in gas pressure helps predict weather patterns, identify approaching storms, and provide valuable information for weather forecasts.

4. Medical Applications

Medical professionals use Boyle’s law when administering anesthesia to patients. Understanding the relationship between gas pressure and volume ensures safe and precise delivery of anesthetic gases during surgeries.

5. Industrial Processes

In various industrial processes, gases are involved in chemical reactions and manufacturing procedures. Knowledge of the pressure law allows engineers to control and optimize these processes effectively.

Factors Affecting Gas Pressure

Several factors influence gas pressure in a closed system. Understanding these factors is essential to grasp the behavior of gases better.

1. Temperature

Temperature has a direct impact on gas pressure. According to Charles’s law, at a constant volume, the pressure of a gas is directly proportional to its temperature. As the temperature increases, so does the pressure, and vice versa.

2. Quantity of Gas

The quantity of gas in a closed system also affects the pressure. More gas molecules result in higher pressure, while fewer molecules result in lower pressure, assuming constant temperature and volume.

3. Type of Gas

Different gases have varying molecular masses, which influence their pressure at a given temperature and volume. Heavier gases have higher pressures, while lighter ones have lower pressures, assuming other factors remain constant.

4. Volume of the Container

The volume of the container holding the gas affects the pressure. A larger container with the same amount of gas will have a lower pressure compared to a smaller container.

Pressure Law in Action: Real-Life Examples

To gain a better understanding of the pressure law, let’s explore some real-life examples where this principle is at work.

1. Aerosol Cans

Aerosol cans, such as those containing spray paints or deodorants, operate based on Boyle’s law. When the nozzle is pressed, the volume of the gas inside the can decreases, causing an increase in pressure. This increased pressure forces the contents out of the can in a spray or mist form.

2. Balloons

When you inflate a balloon, you are essentially increasing the volume of air inside it. As the volume increases, the pressure inside the balloon also rises, allowing it to stay inflated.

3. Breathing

During inhalation, the volume of the lungs expands, which reduces the pressure inside them. As a result, air flows from an area of higher pressure (outside the body) to an area of lower pressure (inside the lungs). During exhalation, the reverse happens, as the volume decreases, increasing the pressure and pushing the air out.

4. Vacuum Cleaners

Vacuum cleaners work based on the pressure law. As the machine creates a low-pressure zone inside, the higher-pressure air from the surroundings rushes in, carrying dust and debris with it.

5. Deep-Sea Exploration

Submarines and deep-sea exploration vessels are designed with an understanding of Boyle’s law. As they descend into the depths of the ocean, the increasing water pressure is compensated by reducing the volume of air inside the vessel, maintaining equilibrium.

FAQs (Frequently Asked Questions)

  1. What is Boyle’s law, and how does it relate to the pressure law?
    Boyle’s law, also known as the pressure law, states that the pressure and volume of a gas are inversely proportional at constant temperature. As the volume of the gas increases, its pressure decreases, and vice versa.
  2. What are some practical applications of the pressure law?
    The pressure law finds applications in gas storage, scuba diving, weather forecasting, medical anesthesia, and various industrial processes.
  3. How does temperature affect gas pressure?
    According to Charles’s law, at a constant volume, gas pressure is directly proportional to its temperature. As the temperature increases, the pressure also increases, and vice versa.
  4. Can the pressure law be applied to both gases and liquids?
    The pressure law is primarily applicable to gases, as gases are highly compressible and their volume changes significantly with variations in pressure.
  5. Why is understanding the pressure law important in scuba diving?
    Understanding the pressure law is crucial for scuba divers to manage their air supply. As they descend to greater depths, the pressure increases, causing the gas volume to decrease, which must be accounted for to ensure their safety.
  6. How is the pressure law relevant to weather forecasting?
    Meteorologists use pressure measurements to predict weather patterns and identify changes in atmospheric pressure. These changes are essential indicators for weather forecasting.

Conclusion

In conclusion, the pressure law, also known as Boyle’s law, is a fundamental principle in the study of gas behavior. Understanding the relationship between pressure and volume helps in various real-life applications, ranging from gas storage to scuba diving and weather forecasting. The pressure

law plays a crucial role in enhancing our understanding of the behavior of gases and is a cornerstone of scientific and practical knowledge.

You may also like to read:

Work Done by an Expanding Gas at Constant Pressure

Work Done by an Expanding Gas at Constant Pressure

Explanation: Work Done by an Expanding Gas at Constant Pressure

Imagine you have a magical balloon that can push things while it expands. Let us talk about how it does work when it’s expanding at a constant pressure.

Work Done:
Work is like magic energy that makes things happen. When our magical balloon expands, it can do work. But how does it work? Imagine you have a balloon inside a piston (a sort of cylinder with a movable lid). If you heat the balloon, it expands, pushing the lid up. That is the balloon doing work!

Constant Pressure:
Now, let us talk about constant pressure. It means the pressure inside the balloon stays the same while it is expanding. If you are blowing up a balloon gently, you are keeping a constant pressure as you blow. In our magical balloon, this constant pressure makes things simpler for us to understand.

Formula for Work Done:
Now, there is a cool formula for the work done (W) by our magical expanding balloon at constant pressure. It’s (W = P x ΔV). Let’s break it down:

  • (W) is the work done.
  • (P) is the constant pressure inside the balloon.
  • (ΔV) is the change in volume, how much the balloon expands.

So, the work done is like saying, “How much did the balloon push the lid of the piston?”

Example:
Imagine you are heating our balloon, and it expands, pushing the piston lid 5 meters up. If the pressure is 2 Newtons per square meter, you can use the formula to find out how much work the balloon did.

In simple terms, it’s like your magical balloon flexing its muscles and pushing things while it grows. The work done is a way to measure how strong and magical your expanding balloon is!

What is Work Done by an Expanding Gas at Constant Pressure?

At its core, work done by an expanding gas at constant pressure refers to the energy transferred when a gas expands while maintaining a constant pressure. This process occurs in various natural and artificial systems, ranging from internal combustion engines to weather phenomena like atmospheric expansion. To understand this concept better, we will now explore the key components of this process.

The Fundamental Principles of Gas Expansion

When a gas expands at constant pressure, it does mechanical work on its surroundings. This work is a result of the gas molecules exerting force on the container walls, leading to the displacement of the walls and the expansion of the gas. According to the ideal gas law, the relationship between pressure (P), volume (V), and temperature (T) is given by:

PV = nRT

Where:

  • P is the pressure of the gas
  • V is the volume occupied by the gas
  • n is the number of moles of the gas
  • R is the ideal gas constant
  • T is the temperature of the gas

Calculating Work Done during Expansion

To calculate the work done by an expanding gas at constant pressure, we can use a straightforward formula:

Work = Pressure × Change in Volume

It’s essential to note that this formula applies when the pressure remains constant throughout the expansion process. When the gas expands, its volume increases, leading to positive work done on the surroundings. In contrast, when the gas is compressed, its volume decreases, and the work is done on the gas itself.

Real-World Applications

The concept of work done by an expanding gas at constant pressure finds practical applications in various industries and natural phenomena. Let’s explore some of the real-world scenarios where this principle is at play:

1. Internal Combustion Engines

In internal combustion engines, the expansion of high-temperature gases pushes the piston, converting the gas’s energy into useful mechanical work. This principle drives our cars, motorcycles, and many other forms of transportation.

2. Climate and Weather Patterns

The expansion of air masses in the atmosphere due to variations in temperature leads to weather phenomena like wind and storms. Understanding this process helps meteorologists predict weather patterns and study climate changes.

3. Pneumatics and Hydraulics

In engineering applications, pneumatics and hydraulics use compressed gases and fluids to perform mechanical work. Understanding gas expansion is crucial for designing efficient and safe systems.

4. Industrial Processes

Various industrial processes involve the expansion of gases for heating, cooling, or mechanical work. Examples include refrigeration systems, turbines, and steam engines.

5. Environmental Science

The study of gas expansion in the Earth’s atmosphere and the behavior of greenhouse gases is vital in environmental science and climate change research.

FAQs

FAQ 1: Does the Work Done by an Expanding Gas at Constant Pressure Always Increase Temperature?

No, the work done by an expanding gas at constant pressure does not always increase its temperature. While the gas does work on the surroundings, the amount of heat exchanged during expansion also plays a crucial role in determining the final temperature change.

FAQ 2: What Happens to the Work Done if the Gas Expands Adiabatically?

When a gas expands adiabatically (without any heat exchange with the surroundings), the work done is entirely used to increase the gas’s internal energy. This leads to a decrease in the gas’s temperature during the expansion process.

FAQ 3: Can the Work Done by an Expanding Gas at Constant Pressure be Negative?

No, the work done by an expanding gas at constant pressure is always positive. The work is done on the surroundings when the gas expands, and it is positive when there is an increase in volume.

FAQ 4: Is the Work Done by an Expanding Gas at Constant Pressure Reversible?

In theory, the expansion of a gas at constant pressure can be reversible, meaning the process can be reversed without any loss of energy. However, achieving perfect reversibility is challenging in real-world scenarios due to various factors such as friction and heat transfer.

FAQ 5: How Does Work Done by an Expanding Gas Relate to the First Law of Thermodynamics?

The work done by an expanding gas at constant pressure is related to the first law of thermodynamics, also known as the law of energy conservation. It states that the increase in the internal energy of a system is equal to the heat added to the system minus the work done by the system on its surroundings.

FAQ 6: Can Work Done by an Expanding Gas at Constant Pressure be Negative?

No, the work done by an expanding gas at constant pressure cannot be negative. As the gas expands and does work on the surroundings, the work is positive and represents energy transfer.

Conclusion

Understanding the work done by an expanding gas at constant pressure is essential for grasping the behavior of gases and their energy transfer properties. From internal combustion engines to weather patterns, this fundamental concept finds applications in various aspects of our lives. Whether you’re an engineer, scientist, or simply curious about the mechanics of the world around us, knowledge of this principle will enrich your understanding of thermodynamics and energy dynamics.

You may also like to read:

Cubic and Area Expansivity of a Gas

Cubic and Area Expansivity of a Gas

Explanation: Cubic and Area Expansivity of a Gas

Imagine you have a balloon, and you want to understand how it behaves when you change its size or temperature. That is where cubic and area expansivity come in.

Cubic Expansivity:
Cubic expansivity is like looking at how the entire balloon changes when you heat it up. Picture your balloon getting warm – it expands in all directions. Cubic expansivity tells us how much the volume of the balloon changes with temperature. If it’s a material that expands a lot when heated, it has a higher cubic expansivity.

Now, think about it this way: if you have a box of balloons, and you want to know how much the whole box changes in volume when heated, you’d use cubic expansivity.

Area Expansivity:
Now, area expansivity is a bit different. Imagine you are only looking at the surface of one balloon, not the whole thing. When you heat it, the rubber on the surface expands. So, area expansivity is about how the surface – not the volume – changes with temperature.

If you have a bunch of balloons taped to a wall, and you want to know how the wall of balloons changes when heated, you would use area expansivity.

In a more science-y way, cubic expansivity β is about changes in volume, while area expansivity α, is about changes in surface area. These are helpful when dealing with gases, and scientists use these values to understand and predict how materials react to changes in temperature. It is like understanding how our balloons, or gases, behave when things heat up or cool down.

What is Cubic Expansivity of a Gas

Cubic Expansivity Definition: The cubic expansivity, also known as volume expansivity or volume thermal expansion, refers to how the volume of a gas changes concerning variations in temperature. It is represented by the coefficient of volume expansion (β). This coefficient quantifies the fractional change in volume per unit change in temperature.

Understanding the Coefficient of Volume Expansion

We can write the coefficient of volume expansion, β, as:

β = (1 / V) * (ΔV / ΔT)

Where:
β – Coefficient of volume expansion
V – Initial volume of the gas
ΔV – Change in volume of the gas
ΔT – Change in temperature

For an ideal gas, the cubic expansivity is constant over a specific temperature range, making it easier to analyze and predict the behavior of gases.

Applications of Cubic Expansivity

Cubic expansivity plays a pivotal role in various practical applications, including:

  1. Thermometers and Thermoregulation: Understanding how gases expand with temperature changes is fundamental in the design and calibration of thermometers used in everyday life and scientific research.
  2. Gas Storage and Transportation: Knowledge of cubic expansivity ensures the safe storage and transport of gases in containers, as it helps calculate volume changes under different environmental conditions.
  3. Climate and Atmospheric Studies: In meteorology and climatology, cubic expansivity is crucial in analyzing the impact of temperature changes on atmospheric conditions and climate patterns.

Area Expansivity of a Gas

Area Expansivity Defined

While cubic expansivity deals with volume changes, area expansivity, also known as linear expansivity, pertains to the change in the surface area of a gas due to variations in temperature. It is represented by the coefficient of linear expansion (α).

The Coefficient of Linear Expansion

The coefficient of linear expansivity, α, measures the fractional change in the surface area of a gas per unit change in temperature. It is mathematically expressed as:

α = (1 / A) * (ΔA / ΔT)

Where:
α – Coefficient of linear expansion
A – Initial surface area of the gas
ΔA – Change in surface area of the gas
ΔT – Change in temperature

Relationship between Cubic and Area Expansivity

It’s essential to note that the cubic expansivity (β) and the area expansivity (α) are related through the equation:

β = 3 * α

This relationship is a fundamental consequence of the three-dimensional nature of gases.

Applications of Area Expansivity

Area expansivity is vital in various practical scenarios, such as:

  1. Thermal Stress Analysis: In engineering and material science, understanding area expansivity helps assess thermal stresses and strains that materials may experience under varying temperatures.
  2. Structural Integrity: For structures like bridges, buildings, and pipelines, knowing the area expansivity of gases involved ensures their integrity and safety across diverse environmental conditions.
  3. Thermal Expansion Joints: In construction, expansion joints are strategically placed to allow for the expansion and contraction of materials due to temperature changes, preventing damage and deformations.

The Relationship between Pressure and Expansivity

Pressure Dependence on Expansivity

It’s essential to recognize that both cubic and area expansivity are affected by pressure changes. When pressure varies, the behavior of gases under temperature fluctuations can be different from what one might expect at atmospheric pressure.

Isothermal and Adiabatic Expansivity

Gases exhibit different expansivity characteristics based on the process they undergo:

  1. Isothermal Expansivity: When the gas undergoes expansion while the temperature remains constant, the process is termed isothermal. The coefficient of cubic expansion (β) and the coefficient of linear expansion (α) are related under isothermal conditions.
  2. Adiabatic Expansivity: If the gas expands without any exchange of heat with the surroundings, the process is termed adiabatic. In this scenario, the relationship between cubic and area expansivity differs.

Real vs. Ideal Gases

In reality, gases deviate from ideal behavior, especially under high pressure and low temperature conditions. Understanding the deviations is crucial for accurate predictions and practical applications.

Factors Influencing Expansivity

Nature of the Gas Molecules

The molecular structure of the gas significantly impacts its expansivity behavior. Different gases possess unique molecular arrangements, leading to variations in their coefficients of volume and area expansion.

Temperature and Pressure

Both cubic and area expansivity are highly dependent on temperature and pressure changes. As temperature rises or pressure increases, gases tend to expand more, affecting their volume and surface area.

Gas Density

Gas density plays a role in determining the expansivity characteristics of a gas. Higher gas density often leads to lower expansivity.

Intermolecular Forces

For gases with strong intermolecular forces, the expansivity might be affected due to the interactions between molecules.

Practical Examples and Applications

Hot Air Balloons: The Perfect Combination

Hot air balloons are a classic example of applying the principles of cubic and area expansivity. When the air inside the balloon is heated, it expands due to the increased temperature. Since the balloon’s material is designed to be flexible, the expansion occurs without causing structural damage. As the air inside the balloon becomes less dense than the surrounding air, it lifts the balloon, creating the thrilling experience of floating in the sky.

Bimetallic Strips: Regulating Temperature

Bimetallic strips consist of two different metals with distinct coefficients of linear expansion, bonded together. When exposed to temperature changes, the metals expand or contract at different rates, causing the strip to bend. This principle is utilized in thermostats to control temperature and is essential in various mechanical and electrical devices.

Thermal Expansion in Engine Components

In automotive and aerospace engineering, understanding the thermal expansion of engine components is crucial. For example, in piston engines, knowing the expansivity characteristics of materials used in pistons, cylinder walls, and cylinder heads helps maintain engine performance and prevent mechanical failures due to thermal stresses.

Expansion of Bridges and Railways

Bridges and railways are subject to temperature fluctuations, which can lead to expansions and contractions in materials. Properly designed expansion joints accommodate these changes, ensuring the structural integrity of these critical infrastructure elements.

FAQs

  1. What is the significance of cubic and area expansivity in everyday life?
    Both cubic and area expansivity have practical implications in various aspects of daily life, ranging from using thermometers for weather forecasts to constructing bridges and roads that can withstand temperature variations
  1. How do cubic and area expansivity relate to each other?
    The cubic expansivity (β) and area expansivity (α) are related through the equation: β = 3 * α. This relationship is based on the three-dimensional nature of gases.
  2. Do all gases exhibit the same expansivity behavior?
    No, different gases have unique molecular arrangements, leading to variations in their coefficients of volume and area expansion.
  3. What happens to gas expansivity under high pressure and low temperature?
    Under high pressure and low temperature conditions, real gases may deviate from ideal behavior, and the expansivity characteristics can differ from those at atmospheric pressure.
  4. How do engineers account for thermal expansion in structural design?
    Engineers use expansion joints and materials with appropriate expansivity characteristics to accommodate thermal expansion and prevent damage to structures.
  5. Why are bimetallic strips used in thermostats?
    Bimetallic strips bend due to different coefficients of linear expansion of the two metals, allowing them to regulate temperature in thermostats and control various devices.

Conclusion

Understanding cubic and area expansivity of gases is crucial for various scientific, engineering, and everyday applications. These thermal properties play a significant role in predicting gas behavior under temperature and pressure changes, enabling the design of safe and efficient systems and structures. Whether it’s hot air balloons floating gracefully in the sky or the robust design of bridges and engines, cubic and area expansivity are ever-present, shaping the world we live in.

You may also like to read:

Fluid Pressure

Fluid Pressure: Definition, Formula and Calculations

Introduction

Fluid pressure is a fundamental concept in physics and engineering that plays a vital role in various industries. Whether you’re studying fluid dynamics or dealing with practical applications, understanding fluid pressure is essential. In this article, we will dive deep into the world of fluid pressure, exploring its definition, formula, calculations, and real-life applications.

What is Fluid Pressure?

Fluid pressure refers to the force exerted by a fluid, either liquid or gas, on the walls of its container or any immersed object. It is the result of the fluid molecules colliding with the surfaces they come into contact with. Pressure is measured in pascals (Pa), named after Blaise Pascal, the French mathematician, and physicist.

Fluid Pressure Formula

The formula to calculate fluid pressure is straightforward and relies on two main factors: the density of the fluid and the depth or height at which the fluid is present. The fluid pressure formula is:

Pressure (P) = Density (ρ) × Acceleration due to Gravity (g) × Height (h)

Where:

  • Pressure (P): si unit in pascals (Pa)
  • Density (ρ) is the mass of the fluid per unit volume, typically measured in kilograms per cubic meter (kg/m³)
  • Acceleration due to Gravity (g) is the gravitational force acting on the fluid, approximately 9.81 m/s² on the Earth’s surface
  • Height (h) is the vertical distance from the surface of the fluid to the point of interest, measured in meters (m)

The formula illustrates that fluid pressure is directly proportional to the density and the height of the fluid column.

Calculations of Fluid Pressure

To illustrate the fluid pressure calculation, let’s consider a practical example:

Example: Calculating Fluid Pressure in a Water Tank

Imagine a water tank with a height of 10 meters, filled with water (density of 1000 kg/m³). What is the fluid pressure at the bottom of the tank?

Using the formula:

Pressure (P) = Density (ρ) × Acceleration due to Gravity (g) × Height (h)

Substitute the given values:

P = 1000 kg/m³ × 9.81 m/s² × 10 m
Thus, P = 98,100 Pa

The fluid pressure at the bottom of the water tank is 98,100 pascals.

Applications of Fluid Pressure

Understanding fluid pressure is essential in various applications, some of which include:

1. Hydraulic Systems

Hydraulic systems rely on fluid pressure to transmit force and energy. We use them in heavy machinery, car brakes, and lifting equipment.

2. Atmospheric Pressure and Weather

Fluid pressure, especially atmospheric pressure, plays a significant role in weather patterns and meteorology.

3. Blood Pressure in Human Body

In the medical field, fluid pressure is crucial for measuring blood pressure, helping diagnose various health conditions.

4. Diving and Underwater Exploration

Divers must consider fluid pressure at different depths to ensure their safety while exploring underwater environments.

5. Water Management

Fluid pressure is critical in water supply systems, irrigation, and water distribution networks.

FAQs

FAQ 1: What are the Units of Fluid Pressure?

The si unit for fluid pressure is in pascals (Pa) in the International System of Units (SI). In some cases, other units like bars, atmospheres (atm), or pounds per square inch (psi) may also be used.

FAQ 2: Can Fluid Pressure be Negative?

Yes, fluid pressure can be negative in certain situations. When pressure below atmospheric (negative gauge pressure) is encountered, it is referred to as a partial vacuum.

FAQ 3: How does Fluid Pressure Change with Depth?

As depth increases in a fluid, the pressure also increases due to the increasing weight of the fluid above. For every additional meter of depth, the pressure increases by approximately 9800 pascals.

FAQ 4: Are There Devices to Measure Fluid Pressure?

Yes, devices like pressure gauges, barometers, and manometers are used to measure fluid pressure accurately.

FAQ 5: Why is Fluid Pressure Important in Engineering?

Fluid pressure is crucial in engineering applications as it affects the stability, design, and performance of various systems, such as hydraulic machinery, pipelines, and aircraft.

FAQ 6: How is Fluid Pressure Calculated in Compressible Fluids?

For compressible fluids like gases, the ideal gas law, incorporating temperature, is used to calculate fluid pressure.

Conclusion

Fluid pressure is a fascinating aspect of physics that influences our daily lives and plays a significant role in various industries. By understanding its definition, formula, and calculations, we can appreciate its importance in different applications. From hydraulic systems to weather patterns, fluid pressure is a fundamental concept that engineers, physicists, and everyday individuals encounter regularly. So, the next time you see water flow or use a hydraulic lift, remember the remarkable science of fluid pressure at work.

You may also like to read:

Energy in a Capacitor

Energy in a Capacitor

What is Energy in a Capacitor?

Energy in a capacitor (E) is the electric potential energy stored in its electric field due to the separation of charges on its plates, quantified by (1/2)CV2.

Additionally, we can explain that the energy in a capacitor is stored in the electric field between its charged plates. When a voltage (V) is applied across the capacitor, it stores energy in the form of electric potential energy. The amount of energy (E) stored is given by the formula (E=0.5CV2), where (C) is the capacitance of the capacitor.

This formula highlights two key factors affecting energy storage: capacitance and voltage. Capacitance represents the capacitor’s ability to store charge, and voltage measures the potential difference across its plates. The (1/2 or 0.5) factor ensures the proper energy calculation for a capacitor.

Increasing capacitance allows a capacitor to store more charge for a given voltage, enhancing energy storage capacity. Similarly, higher voltage increases energy exponentially, emphasizing the sensitivity of energy storage to changes in voltage.

The knowledge of energy in a capacitor is essential in various electronic applications, as it helps engineers design circuits to efficiently store and release electrical energy, impacting the performance of devices like cameras, flash units, and electronic gadgets.

Moreover, capacitors are fundamental components in electrical circuits, used to store and release electrical energy. Understanding how to calculate energy in a capacitor is vital for engineers, technicians, and hobbyists working with electronic systems. By determining the energy stored in a capacitor, one can assess its performance, select appropriate components, and ensure efficient energy transfer within a circuit.

Understanding Capacitors

Before we delve into the calculations, let us gain a clear understanding of capacitors and their role in electronic circuits. A capacitor is an electrical component that stores and releases electrical charge. It consists of two conductive plates separated by a dielectric material, creating an electric field between them. When a voltage is applied across the plates, charge accumulates on the plates, leading to the storage of electrical energy.

Capacitors come in various types, such as ceramic, electrolytic, and tantalum, each with its own characteristics and applications. They are commonly used in power supplies, audio systems, filters, timing circuits, and many other electronic devices.

Energy Storage in a Capacitor

The energy stored in a capacitor is a measure of the electrical potential energy accumulated within it. It represents the ability of the capacitor to deliver electrical energy to a circuit when needed. The energy stored in a capacitor is proportional to the square of the voltage across its terminals and its capacitance.

Energy in a Capacitor Equation

The energy in a capacitor equation is:

E = 1/2 * C * V2

Where:

  • E is the energy stored in the capacitor (in joules).
  • C is the capacitance of the capacitor (in farads).
  • V is the voltage across the capacitor (in volts).

Capacitor Energy Calculation Formulas

To accurately calculate the energy stored in a capacitor, it’s essential to be familiar with the relevant formulas. Here are some key formulas that will help you in capacitor energy calculations:

  1. Energy in a Capacitor: E = 1/2 * C * V2
  1. Capacitance: C = Q / V
  1. Charge: Q = C * V
  1. Voltage: V = √(2 * E / C)

Step-by-Step Guide to Calculate Energy in a Capacitor

Now, let’s walk through a step-by-step guide on how to calculate energy in a capacitor. Follow these instructions to determine the energy stored in a capacitor accurately:

  1. Identify the capacitance (C) of the capacitor. This information is typically provided on the capacitor’s datasheet or marked on its body.
  2. Measure the voltage (V) across the terminals of the capacitor. Use a voltmeter or a multimeter set to the appropriate voltage range.
  3. Plug the values of capacitance (C) and voltage (V) into the energy formula: E = 1/2 * C * V2
  1. Calculate the energy (E) using the formula, ensuring that the units of capacitance are in farads (F) and voltage in volts (V).
  2. The calculated energy represents the amount of electrical energy stored in the capacitor.

By following these steps, you can accurately determine the energy stored in a capacitor, aiding in the design and evaluation of electronic circuits.

Factors Affecting Capacitor Energy

Several factors influence the energy storage capacity of a capacitor. Understanding these factors is crucial for optimizing capacitor performance and selecting appropriate components. Here are some key factors that affect capacitor energy:

  1. Capacitance (C): The capacitance value directly affects the energy storage capacity. Higher capacitance results in greater energy storage.
  2. Voltage (V): The voltage applied across the capacitor significantly impacts the stored energy. Higher voltage leads to increased energy storage.
  3. Dielectric Material: The type of dielectric material used between the capacitor plates affects its capacitance and energy storage capabilities.
  4. Temperature: Capacitor energy storage can be affected by temperature variations. Some capacitors exhibit changes in capacitance with temperature, impacting energy calculations.

Considering these factors when selecting and operating capacitors will ensure optimal energy storage and efficient circuit performance.

Practical Applications of Capacitor Energy Calculation

The ability to calculate energy in a capacitor finds applications in various fields. Here are some practical areas where capacitor energy calculation is essential:

  1. Power Electronics: Capacitors play a crucial role in smoothing voltage and storing energy in power electronic circuits. Calculating energy helps engineers assess the efficiency and performance of power systems.
  2. Renewable Energy Systems: Capacitors are utilized in renewable energy systems like solar and wind power. Accurately calculating energy allows engineers to optimize energy storage and maximize system performance.
  3. Electric Vehicles: Calculating the energy stored in capacitors is vital for electric vehicle design and battery management systems. It aids in evaluating the vehicle’s energy efficiency and range.
  4. Energy Harvesting: Capacitors are often used in energy harvesting systems that convert ambient energy into electrical energy. Energy calculation helps estimate the harvested energy and optimize system design.

By understanding how to calculate energy in a capacitor, professionals in these fields can make informed decisions, enhance system efficiency, and drive technological advancements.

Frequently Asked Questions (FAQs)

Q: What is the formula for calculating energy in a capacitor?

The formula to calculate energy in a capacitor is:

E = 1/2 * C * V2

Q: How can I find the capacitance of a capacitor?

The capacitance value of a capacitor is typically marked on its body or mentioned in its datasheet. If the information is not readily available, you can use a capacitance meter to measure it.

Q: What are some common units for capacitance?

The most common units for capacitance are farads (F), microfarads (µF), and picofarads (pF).

Q: Can I calculate the energy in a capacitor without knowing the voltage?

No, the voltage across the capacitor is a crucial parameter for energy calculation. Without knowing the voltage, it is not possible to determine the energy stored in the capacitor accurately.

Q: How does temperature affect capacitor energy storage?

Temperature variations can affect the capacitance of certain types of capacitors, leading to changes in energy storage. It is important to consider temperature effects

when calculating capacitor energy.

Q: Are there any safety precautions while working with capacitors?

Yes, it is important to discharge capacitors before handling them to avoid electrical shocks. Additionally, follow proper safety procedures and guidelines while working with electrical circuits.

Conclusion

Calculating energy in a capacitor is a valuable skill for anyone working with electronic systems. By understanding the concepts, formulas, and step-by-step procedures outlined in this comprehensive guide, you can accurately determine the energy stored in a capacitor. Remember to consider the factors affecting capacitor energy and their practical applications in various fields.

Capacitor energy calculations enable engineers, technicians, and enthusiasts to optimize circuit design, assess performance, and ensure efficient energy transfer. Mastering the art of how to calculate energy in a capacitor energy calculation will empower you to excel in the field of electrical and electronics.

You may also like to read:

How to Calculate Capacitance

How to Calculate Capacitance

How to Calculate Capacitance

To calculate capacitance (C), use the capacitance formula: (C = Q/V),

Where (Q) is the charge stored on the capacitor and (V) is the voltage across its plates.
Capacitance is a fundamental concept in electrical engineering and plays a vital role in various electronic devices and circuits. It measures the ability of a capacitor to store an electric charge. Calculating capacitance accurately is essential for designing and troubleshooting electronic systems. Here is a simple step-by-step guide on how to calculate capacitance:

StepFormulaDescription
1C = Q/VIdentify the charge (Q) stored in the capacitor and the voltage (V) across its plates.
2Measure Charge (in coulombs)Determine the electric charge stored in the capacitor.
3Also, measure Voltage (in volts)Also, determine the voltage across the capacitor’s plates.
4Divide Charge by VoltageDivide the charge by the voltage to calculate the capacitance.
5C = Q/VSubstitute the values into the formula to find the capacitance.

Note: Ensure that charge is measured in coulombs and voltage is measured in volts for accurate results. Capacitance is typically measured in farads (F).

What is Capacitance?

Capacitance is a property of a capacitor that determines its ability to store electrical energy in the form of an electric charge. It represents the ratio of the charge stored in a capacitor to the potential difference (voltage) across its terminals. In simple terms, capacitance quantifies a capacitor’s ability to hold and release electric charge. The unit of capacitance is the Farad (F), named after the renowned physicist Michael Faraday.

The SI Unit of Capacitance

The Farad (F) is the SI unit of capacitance. It represents one coulomb of charge stored per volt of potential difference. However, in practical applications, capacitances are often expressed in smaller units such as microfarads (μF), nanofarads (nF), and picofarads (pF). These units are derived from the Farad using prefixes to denote the order of magnitude.

Factors Affecting Capacitance

The capacitance of a capacitor depends on various factors, including:

  1. Geometric Configuration: The physical structure and geometry of the capacitor, such as the shape and size of its plates, affect its capacitance.
  2. Dielectric Material: The type of dielectric material between the capacitor plates influences its capacitance. Different dielectric materials have different permittivity values, which directly affect capacitance.
  3. Distance between Plates: The distance between the capacitor plates, also known as the separation or gap, affects capacitance. A smaller gap leads to higher capacitance.
  4. Surface Area of Plates: The surface area of the capacitor plates impacts its capacitance. A larger plate area results in a higher capacitance value.

Parallel Plate Capacitor

One of the most common types of capacitors is the parallel plate capacitor. It consists of two parallel conducting plates separated by a dielectric material. The capacitance of a parallel plate capacitor can be calculated using the formula:

C = (ε * A) / d

Where:

  • C is the capacitance (in Farads)
  • ε is the permittivity of the dielectric material (in Farads per meter)
  • A is the area of overlap between the plates (in square meters)
  • d is the distance between the plates (in meters)

Cylindrical Capacitor

In addition to parallel plate capacitors, cylindrical capacitors are also widely used in various applications. These capacitors consist of a central conductor (usually a wire) surrounded by a cylindrical shell. The capacitance of a cylindrical capacitor can be calculated using the formula:

C = (2πεL) / ln(b/a)

Where:

  • C is the capacitance (in Farads)
  • ε is the permittivity of the dielectric material (in Farads per meter)
  • L is the length of the cylindrical shell (in meters)
  • a is the inner radius of the cylindrical shell (in meters)
  • b is the outer radius of the cylindrical shell (in meters)

Spherical Capacitor

Spherical capacitors consist of two concentric spherical conductors with a dielectric material between them. The capacitance of a spherical capacitor can be calculated using the formula:

C = (4πεab) / (b – a)

Where:

  • C is the capacitance (in Farads)
  • ε is the permittivity of the dielectric material (in Farads per meter)
  • a is the radius of the inner sphere (in meters)
  • b is the radius of the outer sphere (in meters)

Series and Parallel Capacitors

When capacitors are connected in series or parallel, their total capacitance changes. The effective capacitance in a series connection can be calculated using the formula:

1/Ctotal= 1/C1 + 1/C2 + 1/C3 + …

Where:

  • Ctotal is the total capacitance in the series connection
  • C1, C2, C3, … are the individual capacitances of the capacitors

In a parallel connection, the total capacitance is the sum of the individual capacitances:

Ctotal= C1 + C2 + C3 + …

Capacitance Formula

To calculate capacitance for different types of capacitors, use the appropriate formula based on their geometry and configuration. The general formula for calculating capacitance is:

C = Q / V

Where:

  • C is the capacitance (in Farads)
  • Q is the charge stored in the capacitor (in Coulombs)
  • V is the potential difference (voltage) across the capacitor (in Volts)

Capacitance Calculation Examples

Let’s explore a few practical examples to understand how to calculate capacitance.

Example 1: Parallel Plate Capacitor

Consider a parallel plate capacitor with a plate area of 0.1 square meters and a plate separation of 0.01 meters. The dielectric material has a permittivity of 8.85 x 10⁻¹² Farads per meter. To calculate the capacitance:

C = (ε * A) / d

Which implies that:
C = (8.85 x 10-12 * 0.1) / 0.01

Therefore,
C ≈ 8.85 x 10⁻¹¹ Farads

Example 2: Cylindrical Capacitor

Suppose we have a cylindrical capacitor with a length of 0.05 meters, an inner radius of 0.01 meters, an outer radius of 0.02 meters, and a dielectric material with a permittivity of 4 x 10⁻⁹ Farads per meter. To calculate the capacitance:

C = (2πεL) / ln(b/a)
C = (2π * 4 x 10-9 * 0.05) / ln(0.02/0.01)
C ≈ 5.67 x 10⁻¹⁰ Farads

By following the appropriate formulas, you can accurately calculate the capacitance for different capacitor configurations.

Common Mistakes to Avoid

While calculating capacitance, it’s important to be aware of common mistakes that can lead to incorrect results. Here are some common pitfalls to avoid:

  1. Forgetting Units: Always ensure that the values used in the formulas are in the correct units. Mismatched units can lead to inaccurate results.
  2. Ignoring Dielectric Properties: The choice of dielectric material significantly impacts capacitance. Consider the dielectric’s permittivity value when calculating capacitance.
  3. Incomplete Geometry: When calculating capacitance for capacitors with complex geometries, ensure you account for the relevant dimensions and areas correctly.
  4. Neglecting Parallel and Series Connections: When dealing with multiple capacitors, be mindful of their connections and how they affect the total capacitance.

By avoiding these mistakes, you can improve the accuracy of your capacitance calculations.

FAQs about Calculating Capacitance

Q: How can I measure the capacitance of a capacitor?

To measure the capacitance of a capacitor, you can use a capacitance meter or an LCR meter. These specialized instruments provide accurate readings of capacitance.

Q: What are some practical applications of capacitance?

Capacitance has numerous applications in various fields. Some common examples include energy storage systems, electronic filters, touchscreens, power factor correction, and timing circuits.

Q: Can I combine capacitors with different capacitance values?

Yes, you can combine capacitors with different capacitance values. By connecting them in series or parallel, you can achieve different effective capacitance values.

Q: How does temperature affect capacitance?

Temperature can influence the dielectric material and, in turn, the capacitance. Some capacitors exhibit temperature-dependent capacitance, which must be considered in certain applications.

Q: Can I calculate the capacitance of irregularly shaped capacitors?

For irregularly shaped capacitors, it may be challenging to calculate capacitance analytically. In such cases, numerical methods or computer simulations can be employed.

Q: Is capacitance affected by the frequency of the applied voltage?

Yes, capacitance can be frequency-dependent. At high frequencies, capacitors may exhibit variations in their effective capacitance due to factors like dielectric losses and parasitic effects.

Conclusion

Understanding how to calculate capacitance is crucial for anyone working with electronic systems. By grasping the fundamental formulas and concepts discussed in this guide, you can confidently determine capacitance for various capacitor configurations. Remember to consider factors such as geometry, dielectric properties, and series/parallel connections when performing capacitance calculations. With practice and knowledge, you’ll become proficient in calculating capacitance and applying it to your electronic projects.

You may also like to read:

Standing Waves

Standing Waves

What Are Standing Waves?

Standing waves result from the interference of two waves traveling in opposite directions, creating stable patterns of constructive and destructive interference, with nodes and antinodes, in a confined space.

Standing waves are a unique type of wave pattern that appears to be stationary or “standing” rather than moving. They occur when two waves of the same frequency and amplitude traveling in opposite directions interfere with each other. As a result, certain points in the wave appear to be stationary, creating regions of constructive and destructive interference.

Picture tossing a pebble into a tranquil pond; the ripples generated collide and interact, creating stationary points of constructive and destructive interference. These stationary points, known as nodes and antinodes, are the building blocks of standing waves.

How are Standing Waves Formed?

Standing waves are formed by the interference of two waves traveling in opposite directions along the same medium, resulting in a stable pattern of constructive and destructive interference.

Consider a wave traveling to the right and another of the same frequency and amplitude traveling to the left. When these waves meet, their crests and troughs align, reinforcing each other in certain regions and canceling each other out in others. The points of constructive interference, where the amplitudes reinforce, become the antinodes, while the points of destructive interference, where the amplitudes cancel, become the nodes.

As these waves continuously reflect back and forth, the interference pattern persists, causing the wave amplitudes at specific points to remain stationary. This phenomenon gives rise to the characteristic pattern of nodes and antinodes, forming what is known as a standing wave.

The formation of standing waves is dependent on the resonance conditions of the system, where the wavelength of the traveling waves must match the size of the medium. This resonance condition ensures that the reflected waves interfere constructively, sustaining the standing wave pattern. Standing waves are commonly observed in musical instruments, strings, pipes, and other systems where wave interference occurs within a confined space.

The Mathematics Behind Standing Waves

To calculate standing waves, we need to understand the mathematics involved. The key parameters in standing waves are the wavelength (λ), frequency (f), and speed of the wave (v). These three variables are interrelated and can be determined using specific formulas.

Understanding the mathematics behind standing waves adds another layer to their complexity. The relationship between wavelength, frequency, and speed is governed by the wave equation, shedding light on how these waves propagate and persist. This mathematical elegance is not confined to textbooks; it’s the silent orchestrator behind the symphony of standing waves in our world.

The world of acoustics also dances to the tune of standing waves. Walk into a room, and the echoes you hear are a result of sound waves bouncing off surfaces, forming standing wave patterns. Architects and engineers carefully consider these acoustic nuances when designing spaces, ensuring an optimal auditory experience for the occupants.

Calculating the Wavelength

The wavelength of a standing wave is the distance between two consecutive nodes or antinodes. Nodes are the points where the amplitude of the wave is zero, while antinodes represent the points of maximum displacement. The formula to calculate the wavelength is:

λ = 2L/n

Where:

  • λ is the wavelength
  • L is the length of the medium (string, tube, etc.)
  • n is the harmonic number or the number of nodes/antinodes

Determining the Frequency

The frequency of a standing wave corresponds to the number of complete cycles or vibrations it undergoes per unit time. It is measured in hertz (Hz) and can be calculated using the following formula:

f = v/λ

Where:

  • f is the frequency
  • v is the velocity or speed of the wave
  • λ is the wavelength

Finding the Speed of the Wave

The speed of a wave represents how fast it travels through a medium. We can find the speed of the wave by multiplying the wavelength by the frequency:

v = λf

Where:

  • v is the speed of the wave
  • λ is the wavelength
  • f is the frequency

Harmonics and Overtones

The harmonics and overtones play a significant role in standing waves. This is because harmonics are the multiples of the fundamental frequency, while overtones are any frequencies above the fundamental. The formula to calculate harmonics is:

fn = nf1

Where:

  • fn is the frequency of the nth harmonic
  • n is the harmonic number
  • f1 is the fundamental frequency

Calculating the Node Locations

Nodes are critical points in standing waves, and their positions can be calculated based on the length of the medium and the harmonic number. The formula to determine the position of nodes is:

Ln = (2n – 1)λ/4

Where:

  • Ln is the location of the nth node
  • n is the harmonic number
  • λ is the wavelength

Superposition of Waves

Superposition is a fundamental principle in wave mechanics, describing the phenomenon when multiple waves combine to form a resultant wave. In the context of standing waves, the superposition of the incident and reflected waves creates the stationary pattern. The amplitude of the resultant wave at any given point is the sum of the amplitudes of the interfering waves.

Practical Applications

Standing waves has various practical applications. Here are a few examples:

  1. Musical Instruments: Standing waves are responsible for the distinct sound produced by musical instruments, such as guitars, pianos, and wind instruments. Calculating standing waves helps in designing and optimizing instrument acoustics.
  2. Room Acoustics: In architectural and sound engineering, knowledge of standing waves assists in optimizing room acoustics. By identifying the resonant frequencies and node locations, engineers can design spaces that minimize unwanted echoes and improve sound quality.
  3. String Instruments: The calculations of standing waves are crucial in string instruments like violins, guitars, and pianos. Determining the optimal length, tension, and thickness of strings helps produce desired harmonics and tones.
  4. Wireless Communication: Standing wave ratios are essential in radio frequency engineering. By understanding the standing wave patterns in transmission lines and antennas, engineers can optimize signal strength and minimize interference.

FAQ

Q: How can I identify standing waves in a wave pattern?
A: Standing waves can be identified by observing nodes and antinodes in the wave pattern. Nodes represent points of no displacement, while antinodes show maximum displacement.

Q: Can standing waves occur in all types of waves?
A: Standing waves can occur in various types of waves, including mechanical waves like sound waves and electromagnetic waves such as light waves.

Q: Are standing waves only formed between two waves of the same frequency and amplitude?
A: Yes, standing waves are formed when two waves of the same frequency and amplitude interfere with each other. This interference creates regions of constructive and destructive interference, resulting in the stationary pattern.

Q: How are standing waves different from traveling waves?
A: Standing waves appear to be stationary, while traveling waves move through a medium. In standing waves, specific points have zero displacement, unlike traveling waves where the entire wave moves through space.

Q: What is the importance of standing waves in musical instruments?
A: Standing waves are responsible for the characteristic sound produced by musical instruments. By controlling the standing wave patterns, musicians can produce different harmonics and tones.

Q: Can standing waves be observed in everyday life?
A: Yes, standing waves can be observed in various everyday phenomena such as vibrating strings, organ pipes, and even in microwave ovens.

Conclusion

Calculating standing waves is essential for understanding wave behavior and has widespread applications in various fields. In this article, we explored the mathematics behind standing waves, including the calculation of wavelength, frequency, and node locations. We also discussed practical applications in music, engineering, and communication. By mastering the calculations and concepts of standing waves, you can unlock a deeper understanding of wave mechanics and apply it to real-world scenarios.

You may also like to read:

How to Calculate Wavelength

How to Calculate Wavelength

How to Calculate Wavelength

Wavelength is the distance between consecutive points in a wave exhibiting the same phase. The wavelength formula is λ=v/f. Where (v) is the velocity, and (f) is frequency. The unit of wavelength is typically expressed in meters (m) or its multiples, such as millimeters (mm) or nanometers (nm), depending on the scale of the wave.

Here is a step-by-step guide on how to calculate wavelength:

Step 1:

StepDescriptionFormula
1Identify the wave in question.
2Measure the distance between two
consecutive points that are in phase,
such as two successive peaks.
3The measured distance is the wavelengthλ=v/f

Step 2:

StepFormulaDescription
1λ=v/fIdentify the speed of the wave (v) and the frequency (f) of the wave.
2Measure Speed of the wave (v)Remember that the speed of light, is typically around (c=3 x10⁸) meters per second in a vacuum. In this case you will be dealing with a formula λ=c/f
3Measure Frequency (f)Determine the frequency of the wave in hertz (cycles per second).
4Divide Speed of the wave by FrequencyDivide the speed of light by the frequency to calculate the wavelength.
5λ=v/fSubstitute the values into the formula to find the wavelength.

Note:

  • Wavelength (λ) is the distance between two consecutive points in a wave that are in phase (e.g., peak to peak or trough to trough).
  • ( v ) is the wave speed, c is the speed of light, and ( f ) is the frequency.
  • Ensure consistent units for wave speed (meters per second, m/s) and frequency (hertz, Hz) in the calculation.

Wavelength is a fundamental concept that describes the distance between two consecutive points in a wave that are in phase. It plays a significant role in understanding wave behavior and properties.

How to Calculate Wavelength: Explained

To calculate the wavelength of a wave, you need to know the frequency and speed of light. The wavelength of a wave can be determined using the following formula:

Wavelength = Speed of Light / Frequency

Let us break down this formula and understand each component:

  • Wavelength: It represents the distance between two consecutive points in a wave that are in phase. Wavelength is denoted by the Greek letter lambda (λ) and is usually measured in meters (m).
  • Speed of Light: The speed at which light travels in a vacuum is approximately 299,792,458 meters per second (m/s). This constant is denoted by the symbol “c” in the formula.
  • Frequency: Frequency refers to the number of complete cycles or oscillations of a wave that occur per unit of time. We measure frequency in hertz (Hz), where 1 Hz represents one cycle per second.

By applying the formula mentioned above, you can calculate the wavelength of a wave accurately.

Factors Affecting Wavelength Calculation

Several factors can influence the wavelength of a wave. Understanding these factors is crucial in various scientific and technological applications. Let’s explore some of the key factors that can affect wavelength calculations:

1. Medium of Propagation

The medium through which a wave propagates can significantly impact its wavelength. Different materials have different properties that affect the speed of light. For example, light travels slower in materials like glass or water compared to a vacuum. When a wave travels through a medium other than a vacuum, its wavelength can be altered.

2. Wave Type

Different types of waves exhibit different wavelength characteristics. For example, electromagnetic waves, such as visible light or radio waves, have a wide range of wavelengths. On the other hand, sound waves typically have much longer wavelengths.

3. Source Frequency

The frequency of the wave source also affects the wavelength. Higher-frequency waves have shorter wavelengths, while lower-frequency waves have longer wavelengths. The relationship between frequency and wavelength is inversely proportional.

4. Doppler Effect

The Doppler effect refers to the change in frequency and wavelength of a wave due to the relative motion between the source and the observer. This effect is commonly observed in situations involving moving sources of sound or light. The Doppler effect can cause a shift in the wavelength of a wave, resulting in calculations that differ from static scenarios.

Practical Applications of Wavelength Calculations

Wavelength calculations find practical applications in various scientific fields and industries. Let’s explore some real-world examples where knowledge of wavelength is essential:

1. Spectroscopy

In spectroscopy, the measurement of wavelengths is critical for identifying and analyzing the chemical composition of substances. Different elements and compounds absorb or emit specific wavelengths of light, forming unique spectral patterns. By analyzing these patterns, scientists can determine the composition of unknown substances.

2. Telecommunications

The field of telecommunications heavily relies on the understanding of wavelength calculations. Fiber optic cables, which transmit data through light signals, require precise control over wavelengths. By manipulating the wavelength of light, telecommunication engineers can increase bandwidth and transmit more data over long distances.

3. Medical Imaging

In medical imaging technologies like MRI (Magnetic Resonance Imaging) and ultrasound, the wavelength of the waves used is crucial for obtaining accurate and detailed images. The knowledge of wavelength helps medical professionals fine-tune the equipment and optimize imaging techniques for different diagnostic applications.

4. Radio and TV Broadcasting

Radio and television broadcasting utilizes specific wavelength ranges for transmitting signals. By carefully calculating and allocating wavelengths, broadcasters can ensure efficient transmission and minimal interference between different channels.

FAQs about Wavelength Calculations

Q: What is the relationship between wavelength and frequency?

The relationship between wavelength and frequency is inverse. As the frequency of a wave increases, its wavelength decreases, and vice versa. This relationship is due to the speed of light in a vacuum.

Q: Can wavelength be negative?

No, wavelength cannot be negative. It is a physical quantity representing a distance and is always positive or zero.

Q: How can I measure the wavelength of light?

We can measure the wavelength of light by using various experimental techniques. One common method is to use a diffraction grating or a spectrometer, which separates light into its constituent wavelengths, allowing for measurement and analysis.

Q: Are there any other units used to measure wavelength?

While meters (m) are the most commonly used unit for measuring wavelength, nanometers (nm) are also frequently employed, especially when dealing with light waves. Nanometers are equal to one billionth of a meter.

Q: Can the wavelength of a wave change?

Yes, the wavelength of a wave can change when it encounters a different medium or when influenced by other factors like the Doppler effect. Changes in the medium or source frequency can lead to alterations in the wavelength.

Q: How can wavelength calculations be applied to sound waves?

Wavelength calculations are equally applicable to sound waves. In the case of sound, wavelength determines the pitch of the sound. Shorter wavelengths correspond to higher-pitched sounds, while longer wavelengths are associated with lower-pitched sounds.

Conclusion

Understanding how to calculate wavelength is key for various scientific disciplines and technological advancements. Whether you’re studying physics, chemistry, or working in fields like telecommunications or spectroscopy, knowing how to accurately determine wavelength is essential. By applying the formulas and principles discussed in this guide, you can confidently calculate wavelength and gain a deeper understanding of wave behavior and properties.

Remember, the wavelength of a wave depends on factors such as frequency, the medium of propagation, and the type of wave. By considering these factors and applying the appropriate formulas, you can navigate through wavelength calculations effectively.

So, the next time you come across a wave, be it in the form of light, sound, or any other type, you’ll have the knowledge and tools to calculate its wavelength accurately.

You may also like to read:

How to Find Period of a Wave

How to Find Period of a Wave

How to Find Period of a Wave

The period of a wave is the time it takes to complete one full cycle of oscillation, measured from any point on the wave to the corresponding point on the next cycle. We can follow the following step-by-step guide on how to find the period of a wave:

StepDescriptionFormula
1Identify the wave in question.
2Measure the time it takes for one complete
oscillation or one cycle of the wave.
3The measured time is the period (T):T=1/f

Note:

  • Period (T) is the time taken for one complete oscillation or cycle of a wave.
  • Ensure consistent units for time (seconds, s) and frequency (hertz, Hz) in the calculation.

Waves are fascinating natural phenomena that can be found all around us. Whether it’s the ebb and flow of ocean waves, the oscillations of sound waves, or the vibrations in electromagnetic waves, understanding the fundamental properties of waves is essential in various scientific fields. One crucial aspect of waves is their period, which represents the time it takes for a wave to complete one full cycle.

1. Understanding Waves and Periods

Waves are disturbances that propagate through a medium, transferring energy from one location to another without a net displacement of the medium itself. They can be categorized into various types, such as mechanical waves (e.g., sound and water waves) and electromagnetic waves (e.g., light and radio waves). A fundamental characteristic of waves is their period, which represents the time it takes for a wave to complete one full cycle.

2. The Concept of Wave Period

The wave period is a crucial property that describes the temporal characteristics of a wave. It is defined as the time required for a single complete cycle of the wave to pass a given point. In simpler terms, the period of a wave is the time it takes for the wave to go from one peak to the next or from one trough to the next.

3. Exploring the Relationship between Frequency and Period

Frequency and period are reciprocals of each other and are inversely related. Frequency is the number of cycles a wave completes in one second, while period is the time it takes for one cycle. The relationship between frequency (f) and period (T) can be mathematically expressed as:

f = 1 / T
T = 1 / f

4. Simple Harmonic Motion and Periodic Waves

Simple harmonic motion (SHM) is a type of periodic motion where the restoring force acting on an object is directly proportional to its displacement from the equilibrium position. Many waves, including sound and light waves, exhibit periodic behavior similar to SHM. The period of a wave in simple harmonic motion remains constant and can be easily calculated using mathematical formulas.

5. The Mathematical Formula for Calculating Wave Period

For waves exhibiting simple harmonic motion, the period (T) can be calculated using the following formula:

T = 2π * √(m / k)

In this formula, “m” represents the mass of the oscillating object, and “k” represents the force constant or spring constant of the system.

6. Calculating Period using Frequency

As mentioned earlier, the period and frequency of a wave are reciprocals of each other. Therefore, if you know the frequency of a wave, you can calculate its period using the formula:

T = 1 / f

7. Determining Period from Velocity and Wavelength

In the case of waves traveling through a medium, the wave velocity (v) and wavelength (λ) play crucial roles in determining the period. The wave velocity represents the speed at which the wave travels, while the wavelength represents the distance between two consecutive points in phase. The relationship between wave velocity, wavelength, and period can be described by the formula:

v = λ / T

By rearranging this formula, we can solve for the period (T):

T = λ / v

8. Period Calculation for Sound Waves

Sound waves are mechanical waves that require a medium for propagation. To calculate the period of a sound wave, you can use the formula:

T = 1 / f

Where “f” represents the frequency of the sound wave.

9. Period Calculation for Light Waves

Light waves, which are a type of electromagnetic wave, do not require a medium for propagation. Instead, they can travel through a vacuum. The period of a light wave can be calculated using the same formula as sound waves:

T = 1 / f

Where “f” represents the frequency of the light wave.

10. Period Calculation for Water Waves

Water waves, such as those observed in oceans and lakes, are a type of mechanical wave. The period of a water wave can be calculated using the wave velocity (v) and wavelength (λ) as follows:

T = λ / v

11. Period Calculation for Electromagnetic Waves

Electromagnetic waves, including light waves, radio waves, and microwaves, are composed of oscillating electric and magnetic fields. We can find the period of an electromagnetic wave by using the same formula as other types of waves:

T = 1 / f

Where “f” represents the frequency of the electromagnetic wave.

12. Examples of Calculating Period in Real-Life Situations

Let’s explore some practical examples of calculating the period of waves in real-life situations:

Example 1: Calculating the Period of a Pendulum

A simple pendulum consists of a mass attached to a string or rod that can swing back and forth. By measuring the length of the pendulum (L) and the acceleration due to gravity (g), we can calculate the period using the formula:

T = 2π * √(L / g)

Example 2: Calculating the Period of a Guitar String

When plucked, a guitar string vibrates and produces sound waves. We can find the period of a vibrating guitar string by measuring the length of the string (L) and the tension in the string (T). Using the formula:

T = 2L * √(m / T)

Where “m” represents the linear mass density of the string.

13. Factors Affecting the Period of a Wave

Several factors can influence the period of a wave:

  • Length of the wave: Longer waves generally have longer periods.
  • Wave velocity: Higher velocities result in shorter periods.

– Tension or stiffness: Greater tension or stiffness in a medium can lead to shorter periods.

Medium properties: The properties of the medium through which the wave travels can affect the period.

Understanding these factors is essential for accurate calculations and predicting wave behavior.

14. Advanced Calculations: Non-Uniform and Complex Waveforms

While the formulas and methods discussed so far are suitable for waves with simple and uniform characteristics, real-world waves can be more complex and non-uniform. Analyzing and calculating the period of such waves requires advanced mathematical techniques, including Fourier analysis and numerical methods. We use these approaches in fields such as signal processing, acoustics, and optics to handle complex waveforms.

15. Using Technology to Find Period of Wave

In today’s digital age, technology plays a vital role in calculating and analyzing wave periods. Specialized software, computer simulations, and digital instruments enable scientists, engineers, and researchers to accurately determine wave periods in various contexts. These tools enhance precision and provide valuable insights into wave behavior.

16. FAQs about Calculating the Period of a Wave:

Q: Can the period of a wave change?
A: No, the period of a wave remains constant as long as the wave properties and the medium through which it travels remain unchanged.

Q: Is the period of a wave always measured in seconds?
A: Yes, we measure the period of a wave in seconds, representing the time it takes for one complete cycle.

Q: Can I calculate the period of a wave if I only know its velocity?
A: Yes, you can determine the period of a wave if you know its velocity and wavelength using the formula T = λ / v.

Q: What is the relationship between wave period and amplitude?
A: Wave period and amplitude are independent of each other. The amplitude represents the maximum displacement of the wave from its equilibrium position, while the period represents the time it takes to complete one cycle.

Q: Can I calculate the period of a wave if I know its frequency?
A: Yes, you can calculate the period of a wave using the formula T = 1 / f, where “f” represents the frequency.

Q: What units are used to measure wave period?
A: We measure the period of a wave in seconds (s).

17. Conclusion

Understanding how to find period of a wave is essential for comprehending wave behavior and predicting their characteristics. In this article, we explored the concept of wave period, the relationship between frequency and period, and various methods to calculate wave periods in different contexts.

By applying the formulas and techniques discussed, you can determine the duration of waves in mechanical, electromagnetic, and other wave systems. So go ahead and apply your newfound knowledge to unravel the mysteries of waves in the world around you.

You may also like to read:

Frequency of a Wave

Frequency of a Wave

What is Frequency of a Wave?

Frequency of a wave is the number of oscillations or cycles it completes in one second, measured in hertz (Hz). It determines the pitch in sound waves.

The frequency of a wave formula is:

f=1/T

Where T is the period of the wave, representing the time taken for one complete cycle.

The knowledge of frequency of a wave is very important in various fields, such as physics, engineering, and telecommunications. The frequency represents the number of complete cycles or oscillations a wave completes in a given time period.

How to Calculate Frequency of a Wave

To calculate the frequency of a wave, you need to consider two primary factors: the wavelength and the wave speed. The wavelength refers to the distance between two consecutive points on a wave that are in phase, while the wave speed is the rate at which the wave propagates through a medium. By utilizing the relationship between wavelength, wave speed, and frequency, we can determine the frequency of a wave accurately.

Here is a table showing step-by-step guide on how to find the frequency of a wave:

StepDescriptionFormula
1Identify the wave in question.
2Measure the number of cycles per second
or observe the time for one complete
oscillation.
3Calculate the frequency (f):f = 1/T

Note:

  • Frequency (f) is the number of cycles per unit of time, typically measured in hertz (Hz).
  • Ensure consistent units for time (seconds, s) in the calculation.

The Relationship Between Wavelength, Wave Speed, and Frequency

The relationship between wavelength, wave speed, and frequency can be expressed through a simple formula:

Frequency (f) = Wave Speed (v) / Wavelength (λ)

This formula shows that the frequency of a wave is inversely proportional to its wavelength. In other words, as the wavelength decreases, the frequency increases, and vice versa. Similarly, the frequency is directly proportional to the wave speed. As the wave speed increases, the frequency also increases, and as the wave speed decreases, the frequency decreases.

Step-by-Step Guide to Calculating Frequency

Now, let’s delve into the step-by-step process of calculating the frequency of a wave.

Step 1: Determine the Wavelength

To calculate the frequency, you first need to measure or determine the wavelength of the wave. The wavelength can be measured by identifying two consecutive points on the wave that are in phase and measuring the distance between them.

Step 2: Measure the Wave Speed

Next, you need to measure or determine the wave speed. The wave speed represents the rate at which the wave propagates through a medium. The speed can vary depending on the characteristics of the medium, such as its density and elasticity.

Step 3: Apply the Formula

Once you have obtained the values for the wavelength and wave speed, you can apply the formula mentioned earlier:

Frequency (f) = Wave Speed (v) / Wavelength (λ)

Simply divide the wave speed by the wavelength to calculate the frequency of the wave.

Step 4: Perform the Calculation

Now, perform the calculation using the obtained values:

Frequency = Wave Speed / Wavelength

Substitute the values you measured or determined in Steps 1 and 2 into the formula and calculate the frequency.

Factors Affecting Wave Frequency

Several factors can affect the frequency of a wave. It is crucial to understand these factors as they play a significant role in real-life applications and scenarios involving waves. Let’s explore some of the key factors that influence wave frequency.

1. Wave Source

The source of the wave, such as an oscillating object or an electrical signal generator, determines the frequency of the wave. Different sources produce waves with varying frequencies.

2. Medium Properties

The properties of the medium through which the wave propagates can affect its frequency. Factors such as density, elasticity, and temperature of the medium can alter the speed of the wave and consequently impact its frequency.

3. Interference and Resonance

Interference occurs when two or more waves interact with each other. Depending on their relative frequencies, interference can result in constructive or destructive interference, altering the overall frequency. Resonance, on the other hand, is a phenomenon where the frequency of an external force matches the natural frequency of an object, resulting in amplified vibrations.

4. Doppler Effect

The Doppler effect is observed when there is relative motion between the source of the wave and the observer. It causes a change in the perceived frequency of the wave due to the compression or expansion of the wavefront.

FAQs about Calculating the Frequency of a Wave

Q: Can I calculate the frequency of any type of wave using the same formula?

Yes, the formula for calculating the frequency of a wave is applicable to all types of waves, including electromagnetic waves, sound waves, and water waves.

Q: What are the units of frequency?

Frequency is typically measured in hertz (Hz), which represents the number of cycles or oscillations per second.

Q: Is frequency the same as pitch?

No, frequency and pitch are related but not identical. Frequency refers to the objective measurement of the number of cycles per second, while pitch is a subjective perception of how high or low a sound appears to be.

Q: How does frequency affect the energy of a wave?

The frequency of a wave is directly proportional to its energy. Higher frequency waves carry more energy compared to lower frequency waves.

Q: Are there any practical applications of wave frequency calculations?

Yes, wave frequency calculations have various practical applications. They are used in telecommunications, radio and TV broadcasting, medical imaging, music, and many other fields.

Q: Can I use frequency calculations to determine the speed of a wave?

No, frequency calculations alone cannot determine the speed of a wave. To determine the speed, you need to know the wavelength as well.

Conclusion

Understanding frequency of a wave is key in numerous scientific and technological fields. By following the step-by-step guide outlined in this article, you can accurately determine the frequency using the wave’s wavelength and speed. Remember the fundamental formula: frequency equals wave speed divided by wavelength. Additionally, consider the various factors that can influence wave frequency, such as the wave source, medium properties, interference, resonance, and the Doppler effect. By mastering the concept of wave frequency, you can gain a deeper understanding of wave behavior and apply it to real-world scenarios.

You may also like to read:

Frequency of Oscillation

Page 15 of 17

Powered by WordPress & Theme by Anders Norén