What is Micrometer Screw Gauge?
Micrometer screw gauges, also known as micrometers, are precision measuring instruments used in many industries, including engineering, manufacturing, and science. We commonly use these tools to measure the thickness or diameter of small objects with high accuracy. If you’re new to using micrometer screw gauges, you may find it intimidating at first. However, with a little bit of guidance, you’ll be able to master this tool in no time. In this article, we will provide you with a comprehensive guide on how to use a micrometer screw gauge.
We use micrometer screw gauges to measure the thickness or diameter of small objects with high accuracy. They consist of a frame, anvil, spindle, sleeve, thimble, ratchet stop, and locking clamp. Additionally, micrometers can measure in both metric and imperial units and are available in different types, such as outside micrometers, inside micrometers, and depth micrometers. We apply them in various industries, including engineering, manufacturing, and science.
Types of Micrometer Screw Gauges
1. Outside Micrometers
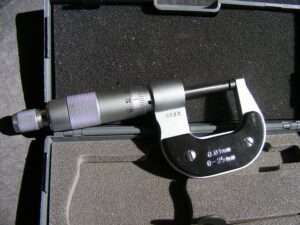
Outside micrometers is for measuring the outer diameter of objects, such as wires, tubes, and shafts. They also consist of a U-shaped frame, an anvil, and a spindle. Furthermore, the anvil is stationary, while the spindle moves towards it to make contact with the object we are measuring. Finally, we can then read the measurement from the sleeve and thimble scales.
2. Inside Micrometers
The use of inside micrometers is to measure the inner diameter of objects, such as pipes and holes. They consist of a T-shaped frame, an anvil, and a spindle. Moreover, the anvil is adjustable and moves towards the spindle to make contact with the object we want to measure. As soon as it makes contact, we can then read our measurement from the scales on the sleeve and thimble.
3. Depth Micrometers
We also use depth micrometers to measure the depth of objects, such as holes and slots. They consist of a base, a rod, and a measuring head. The measuring head contains a spindle and an anvil, which can be adjusted to reach the bottom of the hole or slot. We can now take our measurements.
Parts of a Micrometer Screw Gauge
To understand how to use a micrometer screw gauge, it’s important to know the different parts of the tool and their functions.
1. Frame
The frame is the main body of the micrometer and provides support for the other parts. It consists of two arms connected by a bridge.
2. Anvil
The anvil is the stationary part of the micrometer that the object being measured rests against.
3. Spindle
The spindle is the moving part of the micrometer that makes contact with the object we are measuring. It is attached to the thimble.
4. Sleeve
The sleeve is the stationary outer part of the micrometer that contains the sleeve scale.
5. Thimble
The thimble is the rotating inner part of the micrometer that contains the thimble scale.
6. Ratchet Stop
The ratchet stop is a small lever that prevents the over-tightening of the micrometer and ensures consistent measurement pressure.
8. Locking Clamp
The locking clamp is used to lock the micrometer in place once the measurement has been taken.
How to Read a Micrometer Screw Gauge
To read a micrometer screw gauge, you need to use both the sleeve and thimble scales.
Using the Sleeve Scale
The sleeve scale is the stationary outer part of the micrometer that contains markings in millimeters or inches. The sleeve scale is divided into 10 or 20 equal parts, each representing a specific measurement unit.
Using the Thimble Scale
The thimble scale is the rotating inner part of the micrometer that contains markings in millimeters or inches. The thimble scale is divided into 25 or 50 equal parts, each representing a fraction of a measurement unit.
Adding the Reading
To get an accurate measurement, you need to add the readings from the sleeve and thimble scales. The sleeve scale reading is obtained from the first line that coincides with the thimble scale. The thimble scale reading is obtained from the line that coincides with the axial line of the sleeve.
How to Measure with a Micrometer Screw Gauge
To measure with a micrometer screw gauge, you need to follow these steps:
Preparing the Micrometer
Ensure that the micrometer is clean and calibrated before use. Use the locking clamp to hold the spindle and anvil together.
Positioning the Micrometer
Position the object being measured between the anvil and the spindle. Use the ratchet stop to apply consistent pressure to the object.
Taking the Measurement
Rotate the thimble until it touches the object being measured. Read the measurement from the sleeve and thimble scales.
Recording the Measurement
Record the measurement in a clear and accurate manner. Be sure to note the units used, such as millimeters or inches.
Tips for Accurate Measurement
To obtain accurate measurements with a micrometer screw gauge, consider the following tips:
Clean the Measuring Faces
Ensure that the measuring faces of the anvil and spindle are clean and free from debris, such as dirt or oil.
Avoid Over-tightening
Avoid over-tightening the micrometer, as this can lead to inaccurate measurements.
Use Proper Technique
Use the proper technique when taking measurements to ensure consistent results.
Check for Zero Error
Check for zero error before taking measurements to ensure accuracy.
Maintenance and Care of a Micrometer Screw Gauge
To ensure that your micrometer screw gauge remains accurate and functional, follow these maintenance and care tips:
Storing the Micrometer
Store the micrometer in a dry and clean location
Avoid Impact and Dropping
Avoid dropping or impacting the micrometer, as this can damage the measuring surfaces and affect accuracy.
Cleaning the Micrometer
Clean the micrometer regularly using a soft cloth and a mild cleaning solution. Avoid using abrasive cleaners or solvents.
Lubricating the Micrometer
Lubricate the micrometer occasionally using a small amount of machine oil. Apply the oil to the spindle and anvil surfaces and wipe away any excess.
Calibrating the Micrometer
Calibrate the micrometer regularly to ensure accuracy. Use a calibrated standard of known size to check the micrometer’s accuracy.
Conclusion
A micrometer screw gauge is a precision measuring tool that is commonly used in manufacturing and engineering. It is a versatile tool that can measure a wide range of objects with high accuracy. By understanding the different parts of the micrometer, how to read the scale, and how to take accurate measurements, you can use this tool to measure objects with precision and accuracy.
Frequently Asked Questions (FAQs)
What is the accuracy of a micrometer screw gauge?
The accuracy of a micrometer screw gauge can vary depending on the quality of the tool. However, most micrometers have an accuracy of +/- 0.001 mm or +/- 0.0001 inches.
What is the difference between a micrometer screw gauge and a Vernier caliper?
A micrometer screw gauge is designed to measure small objects with high accuracy, while a Vernier caliper is a more versatile tool that can measure both small and large objects.
How do I know if my micrometer is accurate?
To determine the accuracy of your micrometer, you can use a calibrated standard of known size to check the measurement.
What is the range of measurement for a micrometer screw gauge?
The range of measurement for a micrometer screw gauge can vary depending on the tool. However, most micrometers have a range of 0-25 mm or 0-1 inch.
What is the advantage of using a micrometer screw gauge over other measuring tools?
The advantage of using a micrometer screw gauge is its high level of precision and accuracy when measuring small objects. This makes it an essential tool in industries that require precision machining and manufacturing.
You may also like to read
A Cheetah is Crouched 20m to the East