Introduction
Calipers are instruments we use to measure the length of a metal object. We apply vernier calipers in conditions where the meter rule may not give us a precise measurement of those objects. In the past, calipers were also used to measure direction. In this article, you will learn the best method on how to read a vernier caliper correctly. Before I explain how vernier calipers works, I need to first enlighten you on the concept of calipers and their brief history.
The history of calipers is a very long one because scientists have shown traces of evidence as early as 202 BC to 220 AD in China. Additionally, the Chinese have used calipers to measure objects and for every caliper they produce, they make sure that the manufacturing date of that caliper is engraved on it.
We have two types of calipers
- Engineer’s calipers
- Vernier caliper
Engineer’s calipers: This type of caliper is of two types, we have External and Internal calipers. The external calipers are created with two jaws like that of a crab, it is meant to hook the external length (diameter) of an object in form of a circle like the diameter of a wood.
The internal caliper measures the exact opposite of the external calipers. The hooks of internal calipers are projected outward. Also, Internal calipers can be used to measure the diameter of a pipe from the inside by clipping the two jaws of the caliper from the inside of the pipe. After measuring the diameter of the object, you tighten the knot of the two jaws on the caliper to make sure that your measurement does not change. A meter rule is then used to confirm the reading of the length of the caliper.
What is Vernier Caliper
A vernier caliper is an instrument that helps users to find the exact measurement 0f an object. The history of the application of the vernier caliper began in 1631 by a French mathematician called Pierre Vernier (1584 – 1638). Vernier calliper can give a more accurate measurement than meter rule.
We can measure the internal and external radius or diameter of an hollow material like pipe and can. We can also use vernier caliper to record internal or external diameter of an object.
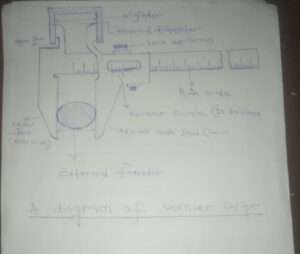
Diagram of Vernier Caliper
Here is a diagram and picture of vernier caliper

Parts of Vernier Caliper
Here are parts of the vernier caliper you need to know:
-
What is the Vernier Scale of a vernier caliper:
As seen on the diagram above, the vernier scale is a scale with fewer calibrations on the instrument. The body where the vernier scale appears is shorter and on top of the longest calibrations. The body of the vernier scale has two jaws and it slides over the main calibrations. Vernier scale measures the fraction of the smallest division on the main scale. The two jaws of the vernier scale are from the right-hand side
-
What is the Main Scale of a vernier caliper:
The main scale is the main body of the vernier caliper. The body of the vernier scale is resting on the calibrations of the main scale. The calibrations on the main scale are longer. You slide the body of a vernier scale over that of the main scale to adjust the jaws to the size of the material you want to measure. The two jaws of the main scale are from the left-hand side.
-
Locking Nut of a Vernier caliper:
After adjusting the jaws of the vernier scale and main scale, you tighten the locking nut to avoid recording wrong measurements.
-
Jaws a Vernier caliper:
There are 4 jaws on the vernier caliper. The two jaws from the right are for the main scale, while the two jaws from the left are for the main scale. You are to push the rotor (on the vernier scale) forward or backward to clip the jaws of the vernier caliper with the object you are measuring. We also have the upper and lower jaw of the vernier caliper. The upper jaw is for measuring the internal diameter of a cylindrical object while the lower jaw is for measuring the external diameter of an object (like a ball).
What is the Vernier Caliper Least Count Formula
To find the vernier caliper least count formula. we apply the formula below:
Least Count, X = Smallest reading on the main scale (Y) / Number of divisions on the vernier scale (Z)
X = Y / Z
and if Y = 1 millimeter
Z = 10 divisions
we now have
X = Y / Z = 1 mm / 10 = 0.1 mm or 0.01 cm
Therefore the least count formula of a vernier caliper is 0.1 mm or 0.1cm
Explanation: We need to understand that the vernier caliper consists of ten (10) divisions, and has a length of 0.09cm or 0.9mm. To get the fractions of the smallest unit on the main scale, we divide the smallest reading on the main scale (Y) by the number of divisions on the vernier scale (Z)
Vernier Caliper Reading

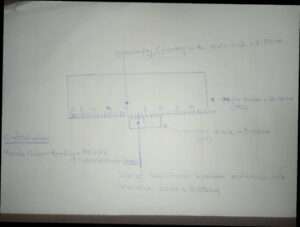
Here is the simplest method of understanding vernier scale reading:
Part 1
- Unscrew the lock nut on the vernier caliper
- Adjust the jaws of the vernier caliper to check for zero error. Connect the zero mark on the vernier scale graduation with the zero mark on the main scale. If the zeros on both scales do not meet, you need to take note of the zero error. If they both coincide, you don’t have any problem.
- Now, attach the object to the right jaw (note: the external jaw is for reading the internal diameter like a cylinder, while the external jaw is for reading the external diameter like a ball).
- Tighten the lock nut
- And look into the open window of the vernier scale, will notice a few calibrations of the main scale.
- Remember that we have 10 divisions on the vernier scale (0.09 mm) and they start from zero.
- Before the zero mark on the vernier scale, look for the last calibration on the main scale within the window (a number on the main scale that came before the zero mark on the vernier scale).
Part 2
- Record that number on the main scale as 5.0 cm
- Now, look for the mark on the vernier scale that connects with the mark on the main scale
- Start counting the marks on the vernier scale until you reach the mark where both the vernier and main scale coincide (0.06 cm)
- Finally, you add the readings of the main scale and that of the vernier scale together = 2.0 cm + 0.03 cm
- Our vernier caliper reading is now 2.03 cm or 20.3 mm
- Vernier calipers have a reading accuracy of 0.01 cm or 0.1mm
Applications of Vernier Caliper
- We use vernier calipers in laboratories(during research) in the area of expansivity and to also understand the diameter of cylindrical objects
- This instrument is also very important in the medical field. It helps to measure the precise length of a medical instrument before it is deployed to the hospitals.
- We apply Vernier caliper in industries to get an exact dimension of instruments like pipe and other materials.
- Vernier caliper is very important in car industries to measure the dimension of wheels and other important equipment
- We also apply vernier caliper in our schools (for the purpose of learning)
You may also like to read:
How to Calculate Cubic Expansivity with Examples
Reference